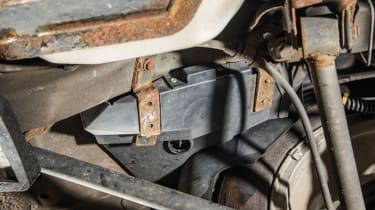
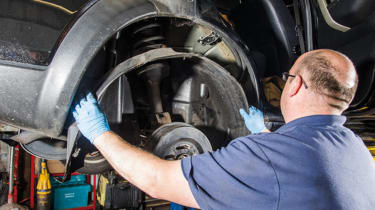
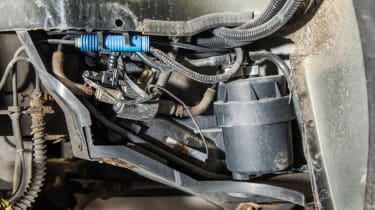
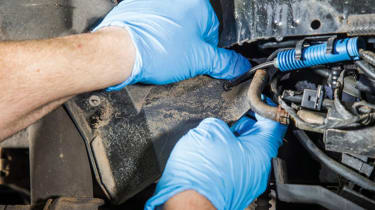
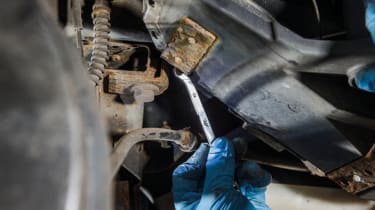
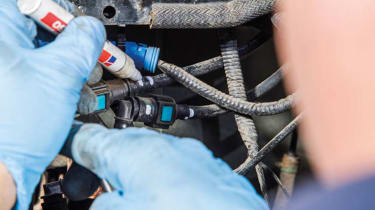
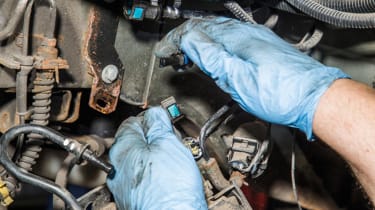
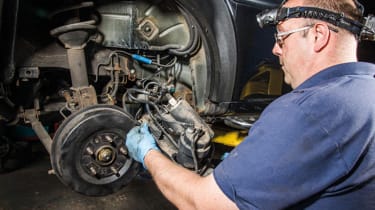
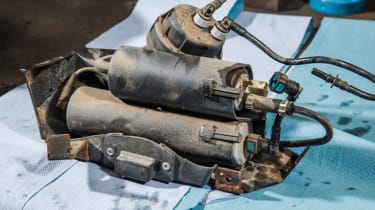
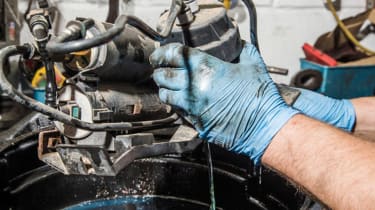
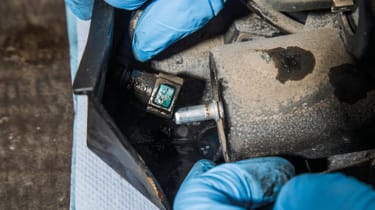
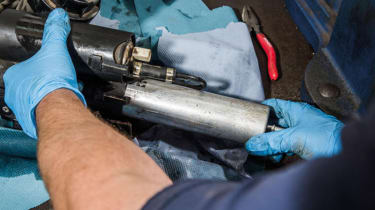
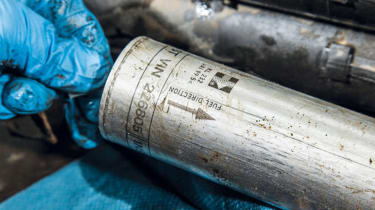
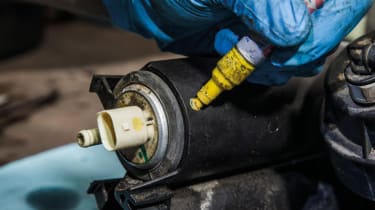
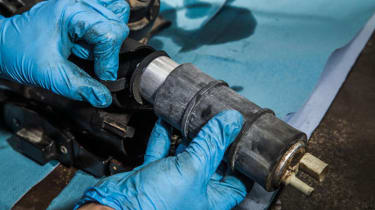
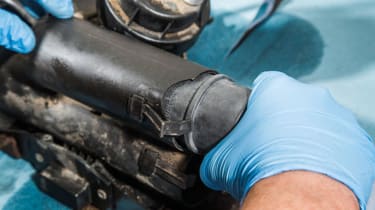
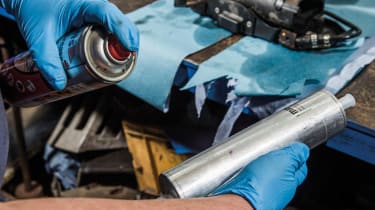
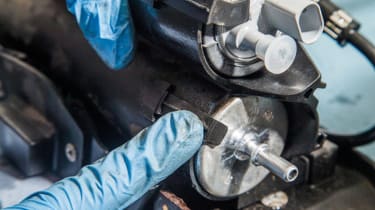
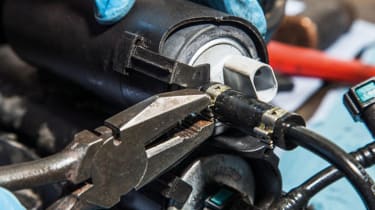
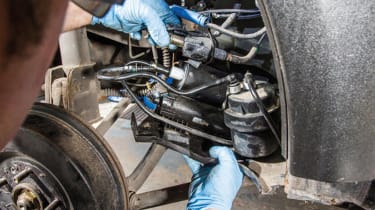
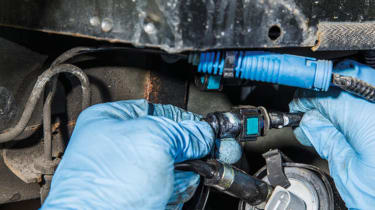
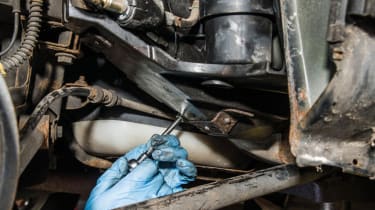
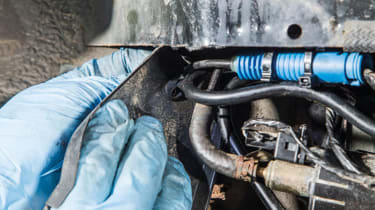
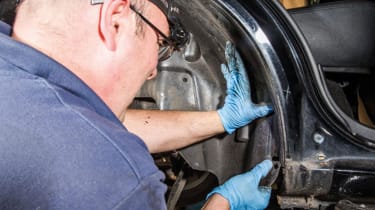
Replacing a Land Rover Freelander fuel pump- pictures

<span>James plugs in his Snap-On Solus Pro to read the OBD code. Sure enough, ‘Delivery Fuel Pressure Monitoring’ was stored on the ECU.</span>

<span>Seen from under the vehicle, the pump and fuel filter is located just forward of the offside rear wheel, protected from dirt by a plastic cover.</span>
- Skip advertAdvertisement - Gallery continues below

<span>It is possible to change the pump from under the vehicle, but removing a wheel makes it much easier to view and access everything.</span>

<span><span>Likewise the wheelarch liner is removed. It’s held by trim clips and screws. The small leading door trim and top arch panel also needs to come off.</span></span>
- Skip advertAdvertisement - Gallery continues below

<span>With the liner removed, the pump, filter and sediment trap are visible. They are held in one assembly which can be removed from the </span><span class="skimlinks-unlinked">vehicle.With</span><span> the liner removed, th

<span>First, remove the trim clip and thread the ABS cable through the rear cover to remove. Take care not to stress or break the ABS loom cable.</span>
- Skip advertAdvertisement - Gallery continues below

<span>Next, undo the two bolts holding the fuel pump/filter assembly. They may be corroded. Use lubricating spray, and a good ring spanner to aid removal.</span>

<span>The assembly can then be lowered slightly to rest on the suspension arm, as the various fuel feeds and electrical connectors are undone.</span>
- Skip advertAdvertisement - Gallery continues below

<span>Take a note of what goes where or, for complete peace of mind, paint mark each supply before splitting connectors to aid correct fitting later.</span>

<span>The fuel and electrical connectors simply clip apart. Press down the blue release panel on the fuel connectors. Be prepared to catch any fuel spills.</span>
- Skip advertAdvertisement - Gallery continues below

<span>The assembly can now be removed, so it can be worked on at the bench. Fuel will spill, so be sure to mop up any spillage which emerges.</span>

<span>The assembly houses the filter at the bottom, the fuel pump above it and the sediment trap behind. We’re changing filter and pump today.</span>
- Skip advertAdvertisement - Gallery continues below

<span>Undo the sediment trap drain, and empty any residual fuel. A small amount of water may come out first, showing the trap is doing its job.</span>

<span>Remove the filter. This can be stuck quite firmly, so gentle taps with a wide-ended drift, or leather hammer can help to release its grip on the mount.</span>
- Skip advertAdvertisement - Gallery continues below

<span>Note the direction indicator as you remove it. The new one obviously needs to go in the same way. Ours appeared to be the original filter </span><span class="skimlinks-unlinked">unit.Note</span><span>the direction indicator

<span>If unsure, before removing the pump, mark its orientation. It may appear pedantic, but fitting the new one the exact same way is best.</span>
- Skip advertAdvertisement - Gallery continues below

<span>Remove the old pump. This comes out much more easily than the filter! Make a note to save the foam seal for re-use on the new pump.</span>

<span>Fit the foam seal to the leading end of the new pump, then ease it into the housing, noting the orientation. It goes in easily with a little force.</span>
- Skip advertAdvertisement - Gallery continues below

<span>Before refitting the new filter, James applies spray grease to aid removal next time. Noting the flow direction, refit the new filter into the housing.</span>

<span>Ensure both clips are located at the end of the filter and pump, showing both are in the correct place. Check the sediment drain is tight.</span>
- Skip advertAdvertisement - Gallery continues below

<span>Refit the fuel lines - they simply clip on with a gentle push. Use pliers with care on the pump hose clips if you don’t have the correct tool.</span>

<span>Offer the assembly up to the vehicle. Connect the various supply lines and electrical feeds without stressing any of the pipes or cables.</span>
- Skip advertAdvertisement - Gallery continues below

<span>At this point, James' clear marking of each fuel line earlier helps ensure each pipe is connected correctly. it is always a good idea to use paint marks.</span>

<span>Refit the two bolts ( renew if rusted or rounded) holding assembly to the vehicle. A smear of copper grease on threads always helps.</span>
- Skip advertAdvertisement - Gallery continues below

<span>Refit the small rear plastic guard. Carefully thread the ABS cable through the narrow slit in the guard first, then refit the trim clip fixings.</span>

<span>Refit the wheel arch liner, and the two whell arch trims. Carefully feed the liner behind the door arch finisher on the leading edge of the arch</span>
- Skip advertAdvertisement - Gallery continues below

<span>Refit the road wheel, then prime the fuel system by leaving hte ignition on for 30 secs whilst the system re-pressurises. It should start normally.</span>

<span>James clears the stored fault code, then the vehicle is taken on a brief road test to assess performance, and to check for any warning lights illuminating.</span>
- Skip advertAdvertisement - Gallery continues below

<span>James clears the stored fault code, then the vehicle is taken on a brief road test to assess performance, and to check for any warning lights illuminating.</span>

<span>On the road test, the full rev range is gradually explored to check the limp mode problem doesn't re-occur under various engine speeds and throttle loadings.</span>
- Skip advertAdvertisement - Gallery continues below
Recommended

Jaguar Land Rover breaks silence on design boss Gerry McGovern exit rumours

Future of Jaguar, kill or cure? 5 huge challenges new CEO must meet to revive JLR

The scariest cars we've ever driven

Jaguar Land Rover cyber attack was costliest in British history, and the pain isn’t over
Most Popular

New Ford Fiesta shaping up for its gigantic 2028 comeback

Car Deal of the Day: The posh Peugeot 3008 for £210 a month is a perfect Christmas gift

Groundbreaking new Jaguar GT: huge price, power and plans for the 4-door EV revealed