Not so good vibrations on the Range Rover Sport - pictures


Recommended
Best cars for road trips - our top models for the ultimate driving adventure
Best cars for road trips - our top models for the ultimate driving adventure
Our experts pick their ideal road trip cars with everything from super-luxury saloons to high-powered supercars
The best ever popemobiles
The best ever popemobiles
For nearly 100 years Popes have had bespoke transport – here we chart the astonishing history of the popemobile
New Range Rover Electric ride review: luxury EV could be worth the wait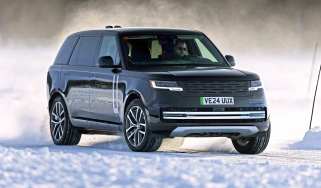
New Range Rover Electric ride review: luxury EV could be worth the wait
We get taken for a ride in the hotly-anticipated all-electric Range Rover ahead of its official reveal
Top 10 best luxury cars to buy 2025
Top 10 best luxury cars to buy 2025
Indulge yourself with our list of the best luxury cars on sale today
Most Popular
Car Deal of the Day: 717bhp BMW M5 Touring super-estate on a tasty lease deal
Car Deal of the Day: 717bhp BMW M5 Touring super-estate on a tasty lease deal
The BMW M5 Touring is M car royalty, with a thoroughly impressive PHEV powertrain. It’s our Deal of the Day for 29 June
Electric car appeal is at its lowest since 2019
Electric car appeal is at its lowest since 2019
From poor electric car sales to crashes in F1, Mike Rutherford thinks its been a crazy few weeks in the automotive world
Range Rover Sport SV gets massive £35k price drop as it enters series-production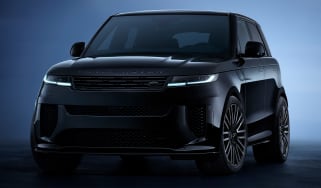
Range Rover Sport SV gets massive £35k price drop as it enters series-production
There’s also a new SV Black trim, and a Range Rover Sport Stealth Package for non SVs