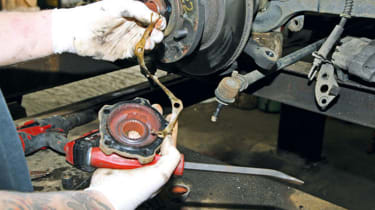
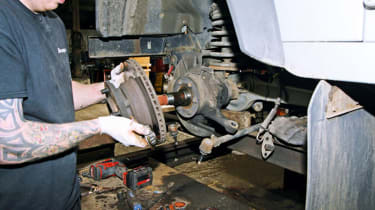
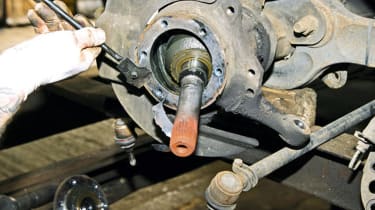
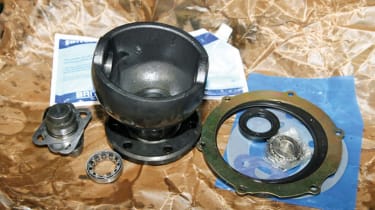
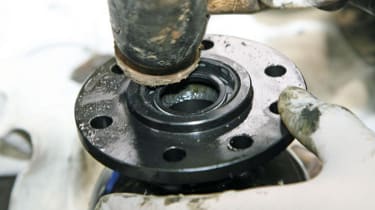
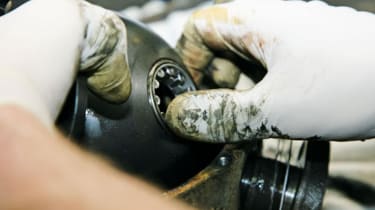
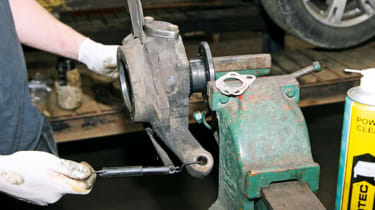
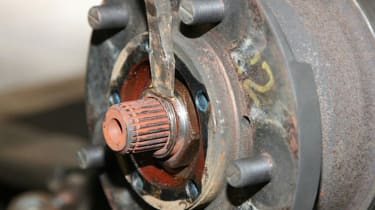
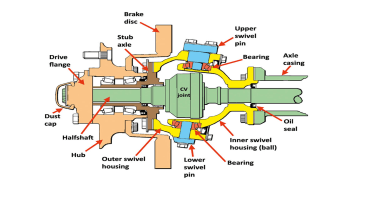
How to overhaul or replace steering steering swivels - pictures


Recommended
Radical new Range Rover GT gets ready to rival BMW iX3 and Volvo EX60
Radical new Range Rover GT gets ready to rival BMW iX3 and Volvo EX60
A fifth Range Rover model will join the range, targeting luxury and driving dynamics like never before
New Range Rover SV Ultra is the brand’s most luxurious, advanced and exclusive car ever
New Range Rover SV Ultra is the brand’s most luxurious, advanced and exclusive car ever
The new Range Rover SV Ultra is available by invitation only, but the new Westminster Edition is open to anyone… with at least £115k to spend
Best luxury SUVs 2026
Best luxury SUVs 2026
Luxury SUVs combine the sophistication of a luxury car with the sheer practicality of an SUV. Here’s our pick of the current crop
Used Range Rover (Mk5, 2021-date) buyer’s guide: top of the luxury SUV list
Used Range Rover (Mk5, 2021-date) buyer’s guide: top of the luxury SUV list
A full used buyer's guide on the Range Rover Mk5 that's been on sale in the UK since 2021
Most Popular
Electricity VAT axe to make EV charging cheaper, just not if you can’t charge at home 
Electricity VAT axe to make EV charging cheaper, just not if you can’t charge at home
VAT on domestic electricity will be scrapped from October, thus widening the gap between home and public charging
New Dacia Spring confirmed for September reveal and super low price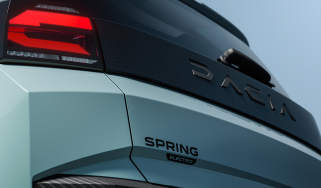
New Dacia Spring confirmed for September reveal and super low price
The new Spring will be based on the adorable Renault Twingo and built here in Europe
New Volkswagen ID. Polo will start from under £24,000
New Volkswagen ID. Polo will start from under £24,000
Volkswagen’s electric supermini is arriving with a 280-mile range, classy looks and a pinch of nostalgic charm