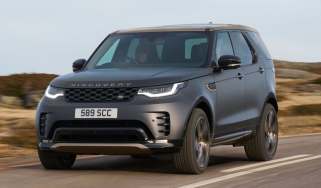
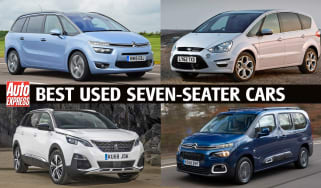
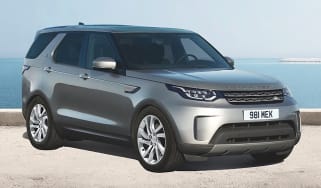
Land Rover Discovery review: still a great posh family seven-seater
The fifth-generation Land Rover Discovery isn't cheap, but it's still one of the best all-round family cars money can buy

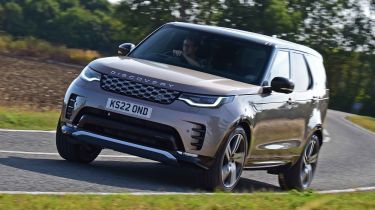
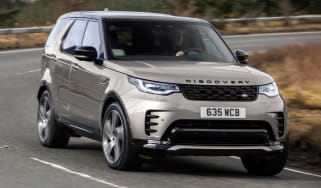
The latest Land Rover Discovery is the most capable yet. It manages to blend the unrivalled off-road ability and toughness of the company's previous 4x4s with a considerably better on-road driving experience and greater efficiency.
The Discovery is impressively refined, yet it still delivers all the versatility you’d expect from an upmarket seven-seat 4x4. In fact, this Land Rover is almost unsurpassed when it comes to coping with everything from the school run to a fully loaded excursion up a mountain.
Granted, there are rivals that are more adept in the bends, and the Land Rover's looks will divide opinion, but few can match the Discovery’s ability to deliver on-road comfort that doesn’t come at the expense of its consummate off-road abilities. If you factor-in some of the smart new technology on board, the Discovery is still a very capable package indeed.
About the Land Rover Discovery
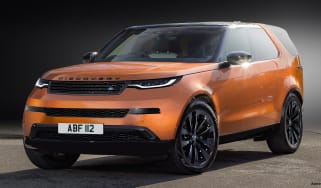
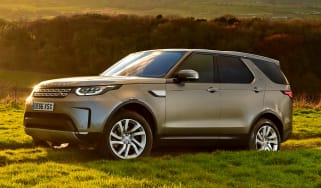
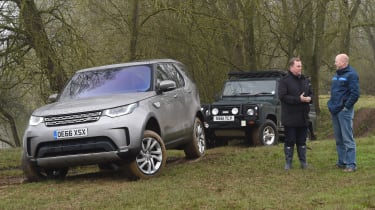
The current Land Rover Discovery is the first to sport a more rounded (and, therefore, aerodynamic) look. Buyers used to the square shape of the Discovery 3 and 4 may not have warmed to the more streamlined design, but what has remained intact is the spacious 7-seater interior that made the latest Discovery’s predecessors so popular. A facelift in 2020 freshened the exterior, streamlined the engine lineup and added Land Rover's new Pivi Pro infotainment system.
Used - available now

2020 Land Rover
Discovery
69,000 milesAutomaticDiesel2.0L
Cash £19,990
2018 Land Rover
Discovery
134,000 milesAutomaticDiesel3.0L
Cash £14,500
2024 Land Rover
Discovery
17,301 milesAutomaticDiesel3.0L
Cash £51,267
2018 Land Rover
Discovery
72,500 milesAutomaticDiesel3.0L
Cash £25,650Unfortunately, as you may have guessed, the Discovery is not cheap. At more than £60,000, it has moved well beyond the realms of the family SUV market and into the world of luxury 4x4s. It challenges other upmarket seven-seat SUVs, such as the Audi Q7 and Volvo XC90, while some buyers might even consider the Defender 130 model (with seating for eight), or cars like the BMW X5 and Mercedes GLE, which offer the option of a third-row of seats that fold out of the boot floor.
A radical diet has helped the latest Discovery shed 480kg when compared to the last model through extensive use of aluminium in its construction. Mind you, a kerbweight of well over 2,300kg means this is still a heavy car.
At least the reduced weight means the range of six-cylinder engines in the Discovery don’t have to work so hard to get you moving. The engine line-up comprises a 3.0-litre mild-hybrid diesel unit available in two states of tune: the D250 delivering 247bhp (oddly only available in high-end Dynamic HSE trim) and the D300 with 296bhp (available throughout the rest of the range). The petrol range consists solely of a 355bhp 3.0-litre straight-six P360 variant. Unlike its Q7, X5, GLE, and XC90 rivals, there isn’t a company-car-friendly plug-in hybrid version of Discovery, so its emissions are relatively high.
Every model features electronically controlled air suspension and Land Rover's Terrain Response system that allows you to adjust the diffs, ride height and traction control to suit different grip conditions. In its basic form, it’ll get you further into the wilderness than almost all its rivals, but with the optional Advanced Off-Road Capability pack, the Discovery should become pretty much unstoppable off-road.
There are four trim levels: S, Dynamic SE, Dynamic HSE, and Metropolitan Edition. If you run a business, there’s also a Commercial version of the Discovery available, where the rear seats have been removed and a bulkhead installed for those who need a vehicle with greater off-road capability than a traditional van can provide.
Whichever model you choose, there aren't many full-size 4x4s that offer the kind of space the Discovery has to offer. The seven-seat layout has room for adults in every seat, while the car's off-road ability is second to none in the class, making this a practical and versatile family car with added 'go anywhere' appeal.
Engines, performance and drive
With air suspension as standard, the Land Rover Discovery generally rides smoothly over most surfaces. It’s most comfortable on smaller wheels (now 20-inch as standard on S, with 19-inch alternatives as an option), because the larger 21 and 22-inch alloys do cause some harsher jolts from the rear axle over more severe bumps, but that’s not too much of a surprise given that the Discovery has been designed to carry seven people and luggage.
The Discovery’s weight (this is still a two-tonne-plus car despite the savings) and long-travel suspension designed to keep the wheels in contact with the ground as much as possible when off-roading, means there’s plenty of body movement. Thankfully, the damping has been tuned so that you end up with motions that are gentle and languid, which can be quite cosseting for passengers.
The steering is slow for off-roading purposes, and isn’t as precise as more road-biassed SUVs like the BMW X5, so the Discovery isn’t a particularly agile car to drive. There’s lots of body roll in faster corners, but it leans over in a predictable manner, so you quickly get used to it and learn to drive in a relaxed and smooth manner. The refined powertrains help, too – we'd argue that comfort and quietness are the most important traits in a car like this that’s more than likely going to be filled with children, or possibly a couple of dogs.
All cars feature an eight-speed automatic gearbox and permanent four-wheel drive, and all models come with Land Rover’s Terrain Response set-up. It can be set to an ‘Auto’ mode so that it’ll automatically sense what surface the car is driving on, and adjust the parameters of the engine, transmission, and traction control system across five different driving modes to suit different types of terrain.
If you regularly have to tow a horsebox or caravan out of a muddy field or happen to regularly go off-road, you may want to consider the Advanced Off-Road Capability pack, because that adds a more advanced Terrain Response II system, along with other mechanical goodies such as low-range gears and a locking rear differential, both designed to better control of the power going to the wheels in order to provide better traction in slippery conditions.
So despite the softened styling and all the refinement of the Discovery, it’s still unrivalled when it comes to off-road performance. Indeed, all this technology only adds to the easy, relaxed and unhurried nature with which the Discovery goes about its business, helping to make this easily one of the most comfortable and practical cars on sale today.
However, the Discovery's incredible size means it can be a little more challenging to thread down a narrow country road, as well as to park (although there are plenty of features to help you with the latter). Similarly, car's the weight means you need to get your braking done nice and early, but the car still feels safe and reassured, with more than enough stopping power.
Engines, 0-60 acceleration and top speed
As part of the 2020 facelift, Land Rover introduced an entirely new range of six-cylinder engines for the Discovery, which benefit from 48-volt mild-hybrid assistance as standard.
This technology provides a tiny bit of electrical assistance to the engine when setting off or acceleration, but not so much that you’d notice, and certainly not to the extent that it can motivate the Discovery under electric power alone, like plug-in hybrid rivals such as the Audi Q7 50 TFSIe, BMW X5 xDrive50e, Volvo XC90 Recharge.
The P360 petrol version takes the title for best performer in the Discovery range. Its 3.0-litre straight six unit produces 355bhp and manages the 0-62mph sprint in 6.5 seconds, before topping out at a 130mph maximum.
The least potent engine is the 247bhp D250, but it can still hold its head high with a decent 8.1 second time and 120mph top speed. The more powerful D300 diesel splits the difference in terms of pace, with a 6.8-second dash to 62mph and a top speed of 130mph. Neither diesel is quite as powerful as the X5 equivalent, though.
MPG, CO2 and running costs
All Discovery models are equipped with a stop-start function, and mild-hybrid technology to help improve economy. The D250 and D300 offer 34.7 and 34.8mpg, respectively, on the combined cycle, while CO2 emissions range from 213g/km to 214g/km, depending on your chosen specification.
Remarkably, the defunct 2.0-litre, four-cylinder P300 was actually less efficient than its six-cylinder P360 sibling, so it’s easy to understand why that version disappeared with the facelift. However, the 27.5mpg combined number of the P360 isn’t brilliant, and neither are emissions of 232g/km.
On the plus side, you’ll benefit from either an 89- (diesel) or 90-litre (petrol) fuel tank, so the Discovery’s cruising range should be well over 500 miles.
Unfortunately, there isn’t a plug-in hybrid version of the Discovery to match its rivals, so company car drivers will be lumped with a much larger Benefit-in-Kind (BiK) tax bill. Even the least polluting model sits in the highest 37 per cent tax bracket, while alternatives such as the BMW X5 xDrive50e are in a much lower 8 per cent band (at least until 2025). Then there are the all-electric seven-seat SUVs like the Kia EV9 to consider, offering just as much space inside, but costing even less per month.
Insurance groups
Insurance premiums won't be particularly cheap, with the entry Discovery D300 S sitting in group 42, rising to group 45 for the top-of-the-range D300 and P360 Metropolitan Edition models. That’s broadly on par with its luxury SUV rivals, and avoids the top 50 band, which some versions of EV9 fall into.
There have been some historic issues with Land Rover owners getting affordable insurance coverage for their cars, although the brand has been working hard on ways to improve theft resistance.
Check if your car needs an MoT and view its complete history with our MoT History Checker...
Depreciation
As with most Land Rovers, the brand’s image and desirability means residual values remain strong – according to our experts. After a typical three-year/36,000-mile ownership period, your Discovery should hold onto between 60 to 66 per cent of its resale value, with the entry S being the strongest performer.
That’s much better than its Audi Q7 and BMW X5 rivals, the latter only maintaining between 40 to 59 per cent of its value over the same period. Limited supply of new Land Rover products have also played a part in the excellent residuals.
To get an accurate valuation on a specific model check out our free car valuation tool...
Interior, design and technology
The latest Land Rover Discovery has grown compared with its predecessor, meaning there’s even more space inside the Discovery – and there's more space than in most of its rivals, too.
Starting with the third row of seats, the Land Rover offers more legroom than either the Audi Q7 or Volvo XC90, allowing fully grown adults to sit in relative ease without the middle row of seats needing to be slid forward all that much. This means there’s plenty of room for passengers in all rows of the Discovery.
Alternatively, if you’re only carrying five, you can maximise passenger space by sliding the middle seats back. There’ll still be more than enough luggage room on offer if you do so.
Elsewhere, quality is high, with plenty of plush materials. It’s not quite to the levels of the Q7 or BMW X5 because there are a few too many cheaper plastics used on the lower sections.
The infotainment and climate controls are all pretty logical, with the physical dials used for the latter allowing easy adjustment of the temperature and heat front seat controls whilst on the move – something that can’t be said of the X5. That climate control panel does, in fact, flip down to reveal a neat hidden storage compartment for mobile phones and sunglasses.
There are plenty of other areas to stow items, including a huge bin beneath the twin cupholders, a large central storage area under the centre armrest (that can be refrigerated with the Comfort pack) and big door bins in the front and rear.
There’s also a twin-glovebox arrangement for even more practicality on all but the most basic S models, while even passengers in the third row get storage areas for trinkets.
As with the exterior design, Land Rover has evolved the Discovery’s cabin design so it feels much more modern and upmarket. Yet, it mixes this with a robust nature in a way that Land Rover has become famous for.
Sat-nav, stereo and infotainment
The Discovery now features the latest Pivi Pro infotainment system, which includes a new 11.4-inch infotainment screen in the centre of the dash. In addition, there are smart new heating and ventilation controls.
Land Rover says the latest infotainment system is 48 per cent larger and three times brighter than the old Touch Pro Duo unit its predecessor had, and it has been designed for ease of use. Given that our experience with the old system lead us to knock half a star from the car’s overall score due to its constant niggles, such as glacially slow loading times, frequently giving us a blank screen, and its poor phone connectivity, the Discovery badly needed a new infotainment system.
Fortunately, Pivi Pro is a world away from the old system and, we find, delivers on the promise of being much easier to use. Frequently used applications can now be accessed directly from the home screen which means that, overall, 50 per cent fewer inputs are required to operate it. We’d still prefer to have physical buttons, or a dial, like the iDrive system used BMW, but at least the screen in the Discovery is easier to operate than most rivals' infotainment systems – particularly the fiddly screen the XC90 uses.
All versions feature Apple CarPlay and Android Auto connectivity as standard, along with wireless phone charging.
You might want to consider the £895, 12-speaker, 400-watt Meridian sound system that’s an option on S models (standard from Dynamic SE and above) upgrade if you like your music. Above that is a 14-speaker, 700-watt surround sound Meridian system (available for £220 on Dynamic SE and above) that delivers a richer sound experience.
Practicality, comfort and boot space
With all seven seats upright, the Land Rover Discovery serves up 172 litres of luggage space – that’s what you’d expect from a tiny city car, and much smaller than the 356-litres provided behind the Volvo XC90.
The sheer size of the Discovery does pay dividends in the end, because luggage capacity increases to a huge 922 litres with the rearmost seats folded down, meaning there’s more luggage room on offer than in its main rivals.
There’s a van-like 1,997 litres of room with all seats folded (which explains why there is a Commercial version available), which certainly helped us during our long-term testing of a Discovery where we completed plenty of trips to the tip and moved a fair amount of furniture in one. So, no matter how big your family is, the car caters for them with plenty of comfort and lots of versatility.
Our only minor gripe is that, while you fold the back rests of the middle row seats electrically, you have to slide the seat bases manually to climb into the very back. The aperture it leaves isn’t huge, but it's adequate when compared to the tighter Audi Q7 and XC90.
Dimensions and size
At nearly five metres long and more than two metres wide, the Discovery feels vast on the road. However, it’s not too much larger than the XC90, while it’s actually shorter than the Q7.
The Land Rover’s tank-like feel on the road stems from its chassis setup, as it’s not quite as agile as either the Audi or Volvo. However, while this gives it a more cumbersome feel in corners, it’s also extremely relaxed and offers better use of space inside, given its footprint.
Leg room, head room & passenger space
No matter what configuration the seats are in, if you’re sat in the middle row there’ll be plenty of room – even with the bench slid all the way forward.
This gives third-row passengers even more space, and in this configuration, it’s really the only car in its class that can accommodate two fully grown adults in the rear in relative comfort. Shoulder room is good, while the Discovery’s traditional stepped roof also offers decent headroom in the very back. This is necessary because of the 'stadium' seating layout, where the back seats are mounted slightly higher than the ones in front of them to give a better view forward.
These cars will probably be bought by families, so it’s good to see that there are ISOFIX child seat tethering points on the front passenger seat, and on the outermost positions of the second row, that offer lots of versatility if you’ve got young children still in car seats. We just urge that you make sure the front passenger airbag does deactivate if you happen to put a child seat up front.
Boot space
Provided the third row isn’t in place, the Discovery’s boot is huge. More importantly, though, it’s also a uniform shape. There’s are clever touches, too, such as a dedicated storage space for the load cover when you’re using all seven seats, and a gesture function (on the top trim level) to help when opening and closing the boot when your hands are full. Simply flick your foot under the bumper, and the boot should open or close.
One big change for this new Discovery is the lack of a split tailgate with a drop-down lower section that can double as a seat. However, Land Rover knows it’s something of a Disco trademark, so has come up with a neat solution.
The one-piece hatch opens, revealing an electrically operated flip-down ledge that can support up to 300kg. It adds yet another practical touch, and should mean owners of previous-generation Discos won’t have to sacrifice any usability when it comes to running this fifth-generation model.
Towing
All Discovery models have a maximum braked trailer towing weight of 3,500kg. That’s a lot more than the 2,700kg capacity of the best-performing BMW X5 xDrive50e.
The Towing Pack includes an electrically deployable tow bar, and the 13-pin electric point is located within easy reach. It also features an Advanced Tow Assist function where you can use the rotary dial from the Terrain Response system. Pull the dial up while reversing, and you can steer the car and caravan/trailer using the moving directional arrows on the screen that show where the car will go. We think that’ll be helpful for those who struggle with this task.
Reliability and safety
Unfortunately, due to the Land Rover Discovery having been out for a while, its 2017 Euro NCAP score of five stars has since expired due to the test getting even tougher.
That’s not to say the Discovery won’t keep you safe because every version comes with autonomous emergency braking to help prevent or mitigate low-speed collisions with other vehicles and vulnerable road users, a lane keep system to help keep you within your lane on the motorway, a driver monitoring system to let you know when you should take a break, a traffic sign recognition system to let you know important information such as speed limits, and adaptive cruise control to maintain a safe distance from the car in front when cruising along the motorway.
If you want extra safety kit like blind spot warning to let you know of cars approaching alongside you on the motorway, and a rear cross-traffic alert system to warn you of vehicles crossing your path as you reverse onto a main road, then you’ll need to add the reasonably priced Driver Assist pack to entry-level S or upgrade to Dynamic SE trim (or above) to get all these features. A 360-degree 3D camera is standard across the range, which is quite generous when rivals like the BMW X5 make you pay extra for this.
When it comes to reliability, Land Rover’s reputation isn’t the best. The company has had consistently poor results in our Driver Power owner satisfaction survey, although there are signs of some improvement, with the brand moving up from 22nd place (out of 29 manufacturers) in 2021, to the 14th spot in 2023 (out of 32 manufacturers) – ahead of premium brands such as Audi, BMW and Mercedes.
Warranty
The Discovery’s warranty is just a little bit better than the standard for the class, with three years of unlimited-mileage coverage. There’s also three years of free roadside recovery.
Both of these are very similar to what you’ll find from BMW, but is quite a bit shorter than the up to 10 years or 100,000 miles of cover you can get with a Toyota or Lexus.
Servicing
The Discovery has long service intervals for all petrol and diesel engines. You’ll only need to visit the dealer every two years or 21,000 miles for servicing, while the timing belt on P360 petrol, and D250 and D300 diesel engines needs changing every 10 years or 105,000 miles, whichever comes first.
Used and nearly new
The Discovery still remains a sought-after luxury SUV, although buyers have more choice than ever from the Land Rover marque, with the Evoque, Discovery Sport, Defender, Velar and Range Rover Sport offering a way into Land Rover ownership. The prestigious Range Rover now sits in an altogether different market, commanding prices that push it into competition with the likes of the Bentley Bentayga and even the Rolls Royce Cullinan.
Other models in the Land Rover lineup may be more fashionable than the Discovery, but it's no less capable than its siblings, offering seven seats, cavernous space, a premium interior and all the 4x4 ability you might need.
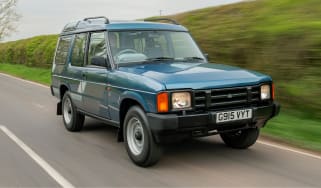
Land Rover Discovery history
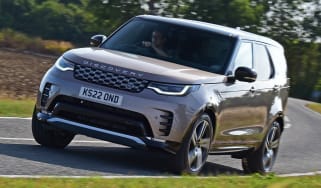
Land Rover Discovery Mk5: 2017-date
Buyers looking for a used Land Rover Discovery will find that the Mk5 model still commands a strong price. Residual values of around 60 per cent after a typical three-year/36,000-mile ownership period (from new), mean that you'll still need plenty of cash to secure a decent example, but in exchange, you'll benefit from a supremely capable workhorse, with added refinement and good levels of on-board tech.
We'd suggest going for a smooth V6 diesel model, while you'll have to decide whether you can live with the base model kit list (which is still pretty comprehensive), or pay a premium for a luxury HSE model. Read our full Mk5 Land Rover Discovery buyer’s guide here…
Land Rover Discovery Mk4: 2009-2017
Based on the Discovery 3, the Mk4 model brought in a fresh exterior design, a new cabin and upgraded tech, but still maintained its practical seven-seat layout and huge load space. Power was limited to a V6 diesel, while unlike the Mk5 model, entry level cars did not offer a tremendous amount of kit, so best to look out for a mid-spec SE or a top HSE version. Read our full Mk4 Land Rover Discovery buyer’s guide here…
Other Land Rover Discovery models
Due to the Discovery's excellent off-road ability, you'll almost certainly find earlier models up for sale at 4x4 specialists all over the country. The Mk1 cars were produced between 1989 and 1998, and are verging on becoming classics, while those looking for even better load space may want to seek out a Mk2 Discovery, which benefited from an extended rear body compared to its predecessor. Production of the Mk2 model continued until 2004, when the Mk3 surfaced with a more modern, stylish exterior and a selection V8 petrol and V6 diesel engines sourced from sister firm Jaguar.
Land Rover Discovery HSE Luxury long-term test
Back in 2017, Editor-in-Chief, Steve Fowler, ran our Discovery long-term test car. At the time, it was our reigning car of the year, and he put it through the rigours of daily life over 15,000 miles to find out if we’d made the right decision.
Fortunately, we had. It proved to be a comfortable and – for the most part – dependable steed that, on more than one occasion, took on the role of a van during several bouts of furniture moving. The infotainment system on our pre-facelift example proved to be a constant source of issues, although that has since been ditched in favour of Land Rover’s latest Pivi Pro system, which came in during the Discovery’s facelift in 2021.
Frequently Asked Questions
More reviews
Long-term tests
Road tests
Which Is Best