Land Rover
Radical new Range Rover GT gets ready to rival BMW iX3 and Volvo EX60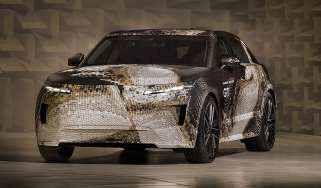
Radical new Range Rover GT gets ready to rival BMW iX3 and Volvo EX60
A fifth Range Rover model will join the range, targeting luxury and driving dynamics like never before
New Range Rover Sport facelift spied with huge exhaust pipes
New Range Rover Sport facelift spied with huge exhaust pipes
One of our favourite luxury SUVs will pick up new styling and tech
New Range Rover Sport Electric prototype review: a new sense of serenity
New Range Rover Sport Electric prototype review: a new sense of serenity
We get an early taste of the new Range Rover Sport Electric, but it's too early to tell if it's the complete package
Best large SUVs to buy 2026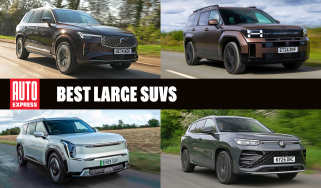
Best large SUVs to buy 2026
Large SUVs are big on comfort, practicality and versatility. Here’s our pick of the best on sale now
New Land Rover Defender facelift brings styling changes and butch new Vertex variant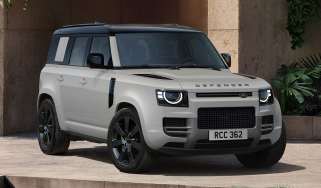
New Land Rover Defender facelift brings styling changes and butch new Vertex variant
The perennial British off-roader has been tweaked for its 2027 model year
Land Rover Defender Octa loses 93bhp, but it’s not all bad news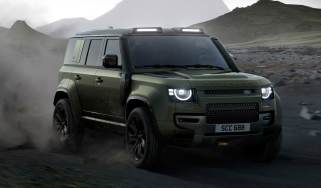
Land Rover Defender Octa loses 93bhp, but it’s not all bad news
New emissions regulations have hit the top-spec Land Rover Defender Octa
Large Premium SUV of the Year 2026: Range Rover Sport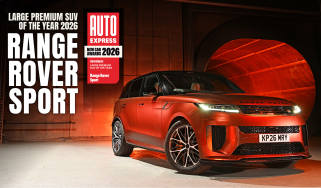
Large Premium SUV of the Year 2026: Range Rover Sport
The Range Rover Sport is the 2026 Auto Express Large Premium SUV of the Year, with the Land Rover Defender and Porsche Cayenne commended
New Land Rover Discovery Landmark: inspired by adventure, destined for the school run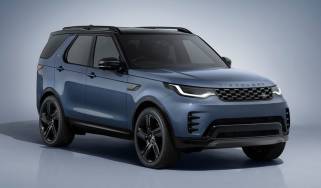
New Land Rover Discovery Landmark: inspired by adventure, destined for the school run
The new Land Rover Discovery Landmark is available to order now, with prices starting from £75,860
Best new cars coming soon: all the big new car launches due in 2026, 2027 and beyond
Best new cars coming soon: all the big new car launches due in 2026, 2027 and beyond
Here are the most important new cars from Alfa Romeo, Audi, BMW, Dacia, Ferrari, Ford, Skoda and more
Four new Land Rover Defender Classic V8s with wild colour-changing paint go to one customer
Four new Land Rover Defender Classic V8s with wild colour-changing paint go to one customer
You’re not likely to see these special Land Rover Defenders doing work around the farm anytime soon
New Land Rover Defender Sport: baby SUV hedges bets with EV and hybrid power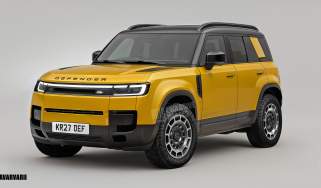
New Land Rover Defender Sport: baby SUV hedges bets with EV and hybrid power
The new Land Rover Defender Sport will sit below the existing Defender in both size and price, and our exclusive image previews how it could look
Land Rover Discovery Sport review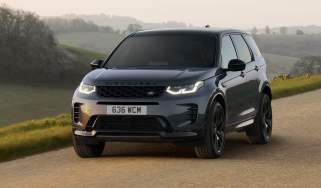
Land Rover Discovery Sport review
Updates have kept the ageing Discovery Sport feeling reasonably fresh, and it still offers unique levels of go-anywhere performance in the class
Best 7-seater cars to buy 2026
Best 7-seater cars to buy 2026
We pick the best seven-seater cars for family life across a wide range of price points
Jaguar Land Rover and Stellantis: latest details on surprise partnership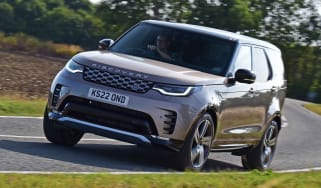
Jaguar Land Rover and Stellantis: latest details on surprise partnership
Stellantis’ surprise joint venture with JLR will not extend to Europe due to ‘product overlap’, but further collaborations have not been ruled out
BMW X3 vs Honda CR-V vs VW Tayron vs MG HS vs Range Rover Sport: five top PHEVs head to head
BMW X3 vs Honda CR-V vs VW Tayron vs MG HS vs Range Rover Sport: five top PHEVs head to head
The five top plug-in hybrid systems go head-to-head on UK roads, in the test no PHEV buyer can do without
New Land Rover Discovery is on track as brand seeks to redefine the model in relation to Defender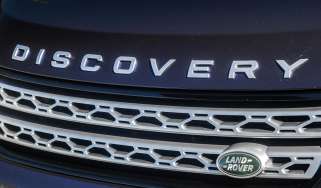
New Land Rover Discovery is on track as brand seeks to redefine the model in relation to Defender
The Land Rover Discovery is set for a reboot according to JLR boss P.B Balaji
New Land Rover Defender updates suggest 'if it ain't broke...' approach
New Land Rover Defender updates suggest 'if it ain't broke...' approach
Land Rover isn’t fixing what isn’t broken with its hugely popular Defender
New Land Rover Discovery Tempest review: high spec stormy special blows up the budget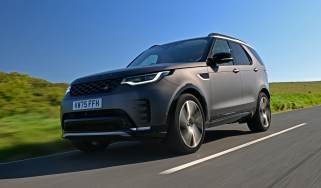
New Land Rover Discovery Tempest review: high spec stormy special blows up the budget
The Discovery Tempest is a luxurious large SUV, but it doesn't quite outshine the desirable Defender
Jaguar Land Rover recalls 170,000 SUVs with UK cars experiencing similar problems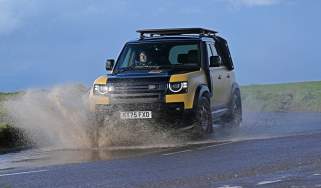
Jaguar Land Rover recalls 170,000 SUVs with UK cars experiencing similar problems
JLR has recalled models from across the Jaguar, Land Rover and Range Rover ranges over a faulty DC-DC converter module
Best small 4x4s 2026: compare small 4WD cars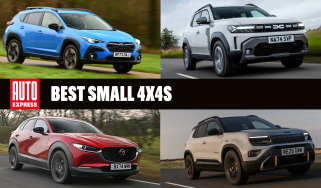
Best small 4x4s 2026: compare small 4WD cars
Need off-road capability in a compact package? Take a look the best small 4x4s
New Range Rover SV Ultra is the brand’s most luxurious, advanced and exclusive car ever
New Range Rover SV Ultra is the brand’s most luxurious, advanced and exclusive car ever
The new Range Rover SV Ultra is available by invitation only, but the new Westminster Edition is open to anyone… with at least £115k to spend
Range Rover Sport review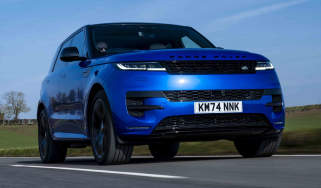
Range Rover Sport review
The Range Rover Sport is hard to beat, because it offers strong performance, superb comfort and an engaging drive
New Range Rover Sport Twenty Edition combines SV kit with PHEV powertrain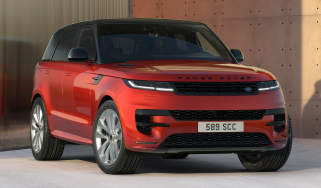
New Range Rover Sport Twenty Edition combines SV kit with PHEV powertrain
The limited edition celebrates 20 years of Range Rover Sport, which offers new features and colours
Best luxury SUVs 2026
Best luxury SUVs 2026
Luxury SUVs combine the sophistication of a luxury car with the sheer practicality of an SUV. Here’s our pick of the current crop
Ultimate Land Rover Defender model range and specs guide: the key options to pick and avoid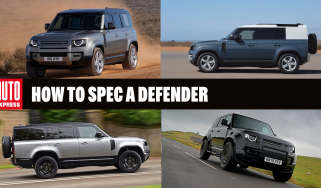
Ultimate Land Rover Defender model range and specs guide: the key options to pick and avoid
The Land Rover Defender is a jack of all trades and master of most. So which should you choose?
Best crossover cars to buy 2026
Best crossover cars to buy 2026
Blending small-car costs with a little SUV muscle, these are the best crossovers on the market
Land Rover Defender review
Land Rover Defender review
Land Rover’s reborn Defender has been a sales hit since it arrived, and subtle revisions haven’t done this 4x4 any harm at all
10 coolest SUVs coming soon: new models aim to take the 4x4 market by storm
10 coolest SUVs coming soon: new models aim to take the 4x4 market by storm
These are fresh SUVs we can’t wait to arrive, from Skoda’s butch baby electric SUV to McLaren’s loftiest creation ever
New Range Rover Sport SV Ultimate pays tribute to the original SVR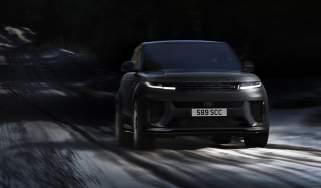
New Range Rover Sport SV Ultimate pays tribute to the original SVR
Available in the same Velocity Blue Gloss as the original Range Rover Sport SVR, new SV Ultimate is limited to 500 UK units
Used Range Rover (Mk4, L405, 2012-2021) review and buyer's guide
Used Range Rover (Mk4, L405, 2012-2021) review and buyer's guide
A full used buyer’s guide on the Range Rover covering the Range Rover Mk4 (2012-2021)
Used Range Rover (Mk5, 2021-date) buyer’s guide: top of the luxury SUV list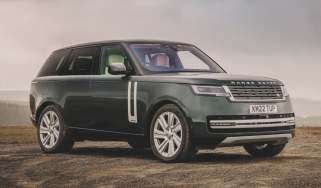
Used Range Rover (Mk5, 2021-date) buyer’s guide: top of the luxury SUV list
A full used buyer's guide on the Range Rover Mk5 that's been on sale in the UK since 2021
New Land Rover Defender OCTA Black 2026 review: family-friendly villainy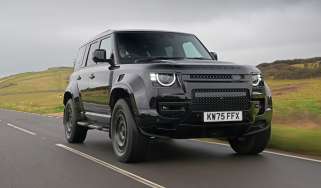
New Land Rover Defender OCTA Black 2026 review: family-friendly villainy
The Defender OCTA Black is a pretty astonishing performance SUV, but it's also surprisingly sensible where it matters
Best 4x4s and off-road cars to buy 2026
Best 4x4s and off-road cars to buy 2026
After a four-wheel-drive vehicle with plenty of off-road clout? We have you covered
New Range Rover facelift on the way: EV to come first with the old look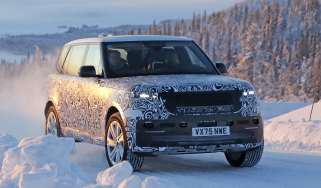
New Range Rover facelift on the way: EV to come first with the old look
Facelifted Range Rover has been caught testing, but won’t arrive until after the Electric version arrives later this year
Car Deal of the Day: Land Rover Defender is unmissable value at £545 a month
Car Deal of the Day: Land Rover Defender is unmissable value at £545 a month
Rarely has the Land Rover Defender delivered such good value for money for leasing customers, which is why the classy 4x4 is our Deal of the Day for 6…