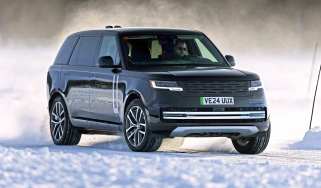
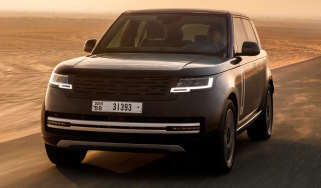
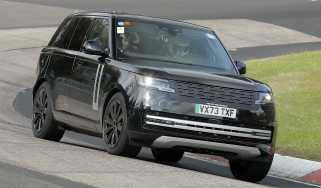
Range Rover review
You’ll need deeper pockets than ever to buy one, but the latest Range Rover is an outstanding luxury SUV
Our opinion on the Range Rover
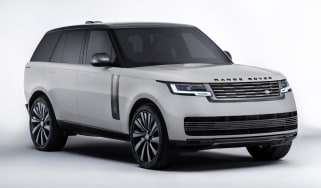
For those that can afford it, the fifth-generation Range Rover represents a further shift upmarket for the iconic 4x4. A focus on luxury, quality and on-board technology, plus the latest Land Rover engineering expertise, means the Range Rover feels supremely capable, whether on or off road.
A strong engine line-up, including mild-hybrid and plug-in hybrid power, just adds to the Range Rover’s appeal, as does its seven-seat flexibility. Land Rover appears to have nailed the execution of its new flagship SUV and, with an all-electric model on the horizon, its popularity should be as strong as ever.
| Key specs | |
| Fuel type | Petrol, diesel, plug-in hybrid |
| Body style | Large SUV |
| Powertrain | 3.0-litre, 6cyl turbocharged petrol plus 1x e-motor, four-wheel drive 4.4-litre, 8cyl turbocharged petrol, four-wheel drive 3.0-litre, 6cyl turbocharged diesel, four-wheel drive |
| Safety | 5-star (Euro NCAP, 2022) |
| Warranty | 3yrs/unlimited mileage |
About the Range Rover
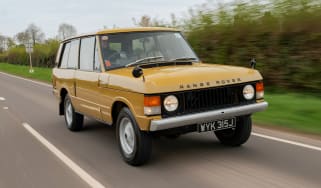
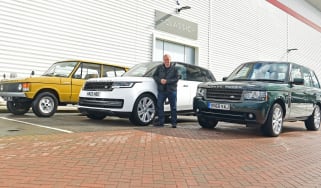
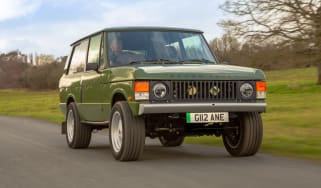
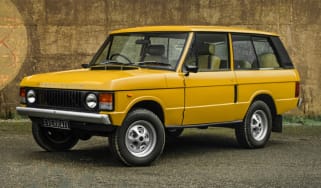
Over the past 50 years or so, the Range Rover has evolved from a rather utilitarian 4x4 model to a luxury SUV that offers first-class levels of comfort and refinement. Gone are the days of washing down the interior with a hose, and instead owners are now cosseted in a sumptuous cabin that showcases Land Rover’s latest onboard technology and engineering prowess. It's such an appealing, first-class package that we named the Range Rover our 2022 Luxury Car of the Year.
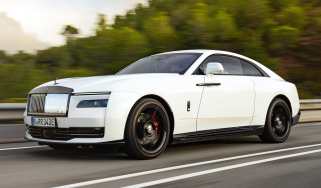
A diversified Land Rover line-up that includes the latest Range Rover Sport, Range Rover Velar and a redesigned Land Rover Defender is primed to take on more mainstream SUV rivals from Audi, BMW, Mercedes and Volvo. But there are ambitions to push the Range Rover more towards luxury competition from brands such as Bentley and even Rolls-Royce. It might be worth rethinking the Range Rover as an uber-luxury car first, that just happens to be masterful off-road, too.
Used - available now

2025 Land Rover
Range Rover
19,674 milesAutomaticDiesel3.0L
Cash £79,950
2025 Land Rover
Range Rover
19,674 milesAutomaticDiesel3.0L
Cash £79,950
2021 Land Rover
Range Rover
34,148 milesAutomaticPetrol2.0L
Cash £39,995
2017 Land Rover
Range Rover
154,980 milesAutomaticDiesel4.4L
Cash £11,995Land Rover has been mindful of the mediocre reputation the previous Range Rover model acquired for overall quality and reliability. Alongside vast investment in the British manufacturer’s Solihull factory, the fifth-generation model uses the company’s MLA-Flex platform, allowing for hybrid, plug-in hybrid and all-electric powertrains, while buyers also have the option of standard or long-wheelbase models.
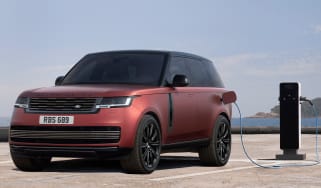
An electric Range Rover is on the cards for late 2025, although the model line-up already includes a strong mix of electrified engines: the 3.0-litre, six-cylinder D300 and D350 diesel versions have mild-hybrid technology, while the P460e and P550e plug-in hybrids offer up to 70 miles of all-electric drive. The 4.4-litre V8 pure petrol unit in the P530 model delivers 523bhp and a menacing growl from under the bonnet, while the more potent P615 has 607bhp at its disposal to throw your head back into its pillowy headrests.
The familiar SE, HSE and Autobiography specification packs make a return with the latest Range Rover, alongside the standalone performance SV model. You’ll need around £100k to even think of becoming a Range Rover owner, and although standard equipment is generous, the HSE trim (costing from nearly £112,000) arguably offers the sweet spot in the lineup. Pair it with either of the diesel engine options or a plug-in hybrid unit (depending on your driving habits) and you’ll have an exceptionally desirable luxury SUV.
Performance & driving experience
| Pros | Cons |
|
|
The Range Rover is renowned for its go-anywhere/do-anything capability, so it's important for it to have an engine that allows it to deliver. The line-up already includes petrol or diesel power with mild-hybrid technology to help improve fuel economy and emissions, two plug-in hybrid versions, and finally two versions of 4.4-litre V8 petrol. An all-electric version is due in late 2025.
All engines deliver plenty of power, but it’s the tremendous torque figures that help the Range Rover waft along with luxurious ease. Both the diesel and plug-in hybrid models provide up to 700Nm of pulling power, while the V8 powerplant generates a whopping 750Nm. We found the standard eight-speed ZF automatic gearbox smooth for the most part, although it can be a little hesitant to kick down on occasion.
Those who are determined to take their £100k-plus Range Rover off-road will be pleased to hear that their luxury SUV comes equipped with Land Rover’s Terrain Response technology – a system that adjusts the car’s set-up to suit any particular driving conditions. However, you’ll have to find some really extreme ground before the Range Rover starts to feel overwhelmed.
Performance, 0-60mph acceleration and top speed
While the Range Rover has always been a great off-road vehicle and offered more limo-like luxury with every new iteration, its straight-line speed is sometimes underplayed. For a 2.5-tonne SUV, it’s seriously quick, because even the entry-level 296bhp D300 diesel model is capable of 0-62mph in 6.3 seconds and hitting a top speed of 135mph.
Upgrading to the 345bhp D350 version buys you a 0-62mph sprint time of 5.7 seconds, plus a 145mph v-max. Anyone after petrol power will have to either go for a company-car friendly plug-in hybrid or a fully fledged turbocharged petrol V8.
If you need a luxury SUV and don’t mind the fuel consumption, take a look at the P530 that’s exclusive to the Autobiography trim. It comes with a 4.4-litre V8 petrol engine making 523bhp and will hit 0-62mph in a thoroughly rapid 4.4 seconds, and top speed of 155mph.
The more efficient P460e and P550e plug-in hybrid models carry a little more weight (compared to their pure combustion-engined siblings) because of their 38.2kWh battery and electric motor, but will complete 0-62mph in 6.0 seconds and 5.5 seconds, respectively. Interestingly, top speed in EV mode for both PHEV models is 87mph, so you can cruise along without using a drop of petrol.
If you need a luxury SUV and a supercar in your life, why not combine the two and order the Range Rover SV? It uses the same 4.4-litre V8 petrol as the P530, just with the wick turned up to a highly indecent 607bhp. It’ll rocket this flagship Land Rover from 0-62mph in a rather appropriate 4.3 seconds, before taking you on to a 162mph maximum.
Town driving, visibility and parking
The latest Range Rover is so wide that we’d suggest it’s best to avoid routes with width restrictors, lest you risk damaging a set of very expensive alloy wheels or incur a pricey trip to the body shop to repair its aluminium exterior panels.
There are a few tricks up the Range Rover’s sleeves to help you out if you do find yourself on a trip to Saville Row followed by afternoon tea at The Ritz. All-wheel steering helps manoeuvrability, particularly at slower speeds, and gives the Range Rover an impressive 10.95-metre turning circle – which is the same as most family hatchbacks, and lessens the stress of navigating your way around a tight underground car park. You will still be making full use of the standard 360-degree camera system (which, by the way, has a very sharp and detailed picture quality) and parking sensors front and rear due to the car’s over five-metre length and two-metre width.
The accelerator response is smooth and well calibrated, making the car quite relaxing to pilot through traffic, and the brakes are easy to modulate. We found the stop-start system is unobtrusive and quick to restart when setting off from traffic lights, and the raised driving position provides a good view out over that long bonnet. The ride deals with things like speed bumps well, but the larger wheel sizes do transmit a little too much of the initial shock from potholes into the cabin at low speeds.
B-road driving and handling
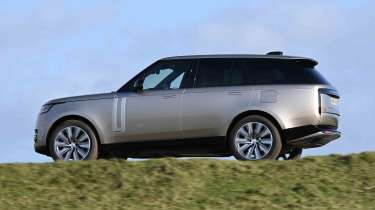
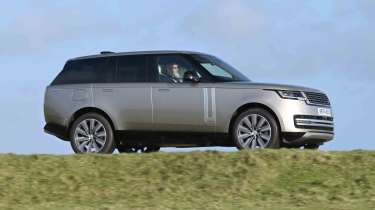
Once outside the city limits, you can set the drive mode to the Dynamic setting if you want to firm up the suspension and test the Range Rover’s handling abilities through tighter B-road corners. We can confirm it’s pretty good for a large SUV, although there’s still plenty of body lean in the bends, preventing it from feeling quite as well controlled as a BMW X7 on challenging roads. However, that’s not really the point of Land Rover’s flagship model – if you’re looking for a little more agility, the latest Range Rover Sport could provide the answer.
The standard air suspension is adept enough to filter out most imperfections in the road. Again, specifying bigger alloy wheels means the odd thump may be heard in the cabin, but it's all controlled and absorbed perfectly well at higher speeds.
Motorway driving and long-distance comfort
Refinement remains superb, with little road noise and engine noise at a cruise. We have found that examples without laminated side glass do suffer with a bit more wind noise than we’d like for a luxury car, so we would advise you to tick that option when you come to order one.
If you happen to find yourself on the German Autobahn or you’re loaded up with people and luggage, you’re supposed to increase the tyre pressures dramatically (the label is found in the driver’s door opening) because the Range Rover is a big and heavy vehicle capable of at least 135mph in its least powerful D300 guise. Just remember to adjust the tyres back to down again once you get into town because those high pressures dramatically worsen the car’s normally supple ride.
Expert view, on driving experience
"I have been fortunate enough to use a Range Rover abroad, and found its height-adjustable air-suspension and nifty four-wheel steering that aids manoeuvrability at low speeds invaluable in a tight underground carpark in Stuttgart." - Max Adams, Online reviews editor, who drove the Range Rover in Europe
| Model | Power | 0-62mph | Top speed |
| Range Rover D300 SE | 296bhp | 6.3 seconds | 135mph |
| Range Rover D350 SE | 345bhp | 5.7 seconds | 145mph |
| Range Rover P460e SE | 454bhp | 5.5 seconds | 140mph |
| Range Rover P615 SV | 607bhp | 4.3 seconds | 162mph |
MPG & running costs
| Pros | Cons |
|
|
If you’re in the market for a Range Rover, then it’s fair to assume that higher fuel costs won’t deter you from making a purchase.
Buyers have the choice of petrol or diesel models with mild-hybrid technology, while business users will find the low benefit-in-kind tax rate of the plug-in hybrid model particularly attractive. An electric Range Rover has been on the cards for quite some time, and could be worth waiting for if you’re a chauffeur and most of your driving is done in town, because it’ll no doubt be cheaper to run and maintain than a regular petrol or diesel model. For private buyers with access to charging at home, the EV version could be a very affordable Range Rover to run, especially when charging with cheaper overnight electricity tariffs.
Despite the industry's march towards full electrification, diesel power is still relevant for the luxury SUV market. If you’re planning on frequent longer journeys, then the oil burner makes financial sense; the D300 model is the cheapest entry point into Range Rover ownership and will return up to 38.2mpg on the WLTP combined cycle, and emits 194g/km of CO2. The D350 produces more power from the same 3.0-litre, six-cylinder diesel engine, but Land Rover claims it'll still return up to 38.3mpg and 194g/km of CO2. You’ll struggle not to wince as you fill the 80-litre tank in either version (the V8 petrols gets a 90-litre tank and the PHEV versions 71.5-litres), but at least you should be able to cover more than 600 miles between visits to the forecourt – just as we found when we ran a Range Rover D350 as part of a long term test.
If you prefer to go with petrol power, you’re options are the P530 and P615, both of which come with a 4.4-litre twin-turbo V8 engine. They’re a lot thirstier than the diesel with a WLTP combined figure of 24.5mpg and 261g/km for the P530, and 24.2mpg and 264g/km of CO2 for the P615. The plug-in hybrid P460e and P550e models do better, with very high combined figures of 375.7mpg and emissions of 17g/km, and 356.9mpg and 18g/km, respectively.
| Model | MPG | CO2 | Insurance group |
| Range Rover D300 SE | 38.2mpg | 194g/km | 50 |
| Range Rover P460e SE | 375.7mpg | 17g/km | 50 |
| Range Rover P615 SV | 24.2mpg | 264g/km | 50 |
Electric range, battery life and charge time
The P460e and P550e use the same 38.2kWh battery and 141bhp electric motor, and offer over 70 miles of all-electric drive, which should be plenty for most commutes or those using their Range Rover for shorter trips in and around town. There is a dedicated EV driving mode, but Hybrid is the default setting. The plug-in Range Rover also uses geofencing technology to save battery power and ensure you can run on electric power in low-emission zones. This can be done manually, too, by using the ‘Save’ setting, deploying energy later on in a journey when it's needed.
Fully recharging the P460e or P550e's battery using a typical 7.4kW home wallbox or public charging point should take around five hours. But, unusually for a plug-in hybrid, the Range Rover PHEVs feature CCS rapid charging and can reach charging speeds of up to 50kW, so a 0 to 80 per cent top-up will take less than an hour if you use a suitably fast charger.
| Model | Battery size | Range | Insurance group |
| Range Rover P460e SE | 38.2kWh (31.8kWh usable) | 73.3 miles | 50 |
| Range Rover P550e Autobiography | 38.2kWh (31.8kWh usable) | 71.5 miles | 50 |
Insurance groups
As you might expect with a luxury SUV, insurance premiums are going to be expensive. All Range Rover models are in the top group 50 rating, which is the same as a BMW X7, while the more affordable Audi Q7 starts in insurance group 45.
Tax
The high emissions of the diesel and petrol models mean you’re in for a hefty first-year VED tax bill, while the lofty pricing means you’ll have to pay the luxury car tax supplement over and above the regular vehicle excise duty (VED) tax rate for every version of Range Rover.
Business users will be attracted to the low benefit-in-kind tax rate of the plug-in hybrid models, which will be more affordable than the diesel or petrol versions.
Depreciation
The latest Range Rover is predicted to be a strong performer on the used market, with our expert data suggesting that the seven-seat, LWB D350 Autobiography is expected to hold on to the most value should hold onto to 62 per cent of its original value after three years and 36,000 miles, while the LWB P460e SV is likely to lose the most at 51 per cent.
That compares well with the BMW X7, which is only expected to maintain around 48 to 52 per cent over the same period.
Interior, design & technology
| Pros | Cons |
|
|
The fifth-generation Range Rover sits on the same MLA-Flex platform as the latest Range Rover Sport, with the vehicle architecture designed to house mild-hybrid, plug-in hybrid and all-electric powertrains. It’s a strong engine line-up that fits well with the Range Rover’s capable image.
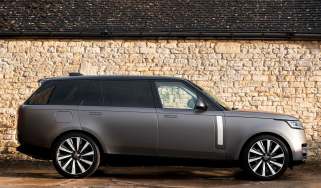
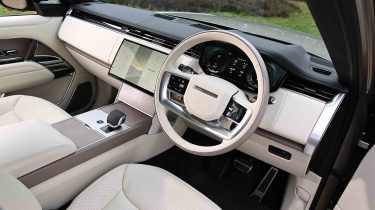
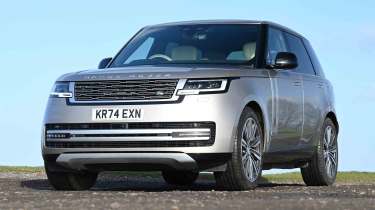
A quick look at the exterior shows that Land Rover has elected to take an evolutionary path with the luxury SUV’s design. Taking in the front three-quarter stance, the standout feature is the simple, minimalist approach running from front to back. The door creases that featured on the previous model have been ironed out, while flush door handles, slimmer headlights and a less fussy front-end add a fresher feel.
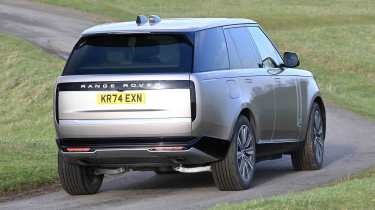
It’s at the rear where changes are more noticeable; redesigned lights are now ‘hidden until lit’, which means the traditional cluster sits within a gloss black boot surround, while the indicators are either side of the Range Rover script on the tailgate.
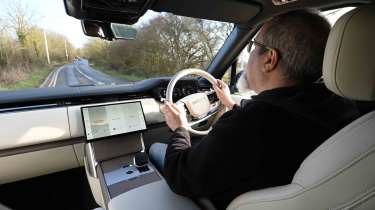
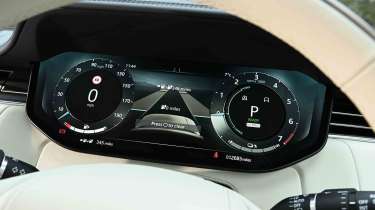
The interior still provides the same imperious driving position, and there’s plenty of onboard technology, such as a 360-degree camera and a digital rear-view mirror, to help provide the best view whether on or off-road.
One minor gripe we do have is with the gear selector, which feels fine, but can be rather awkward to use. Having to press a button at the back of the lever prior to selecting a gear can be irksome if you’re in a rush, while the selector action is overly sensitive, making it more difficult than it should be to find neutral.
Interior and dashboard design
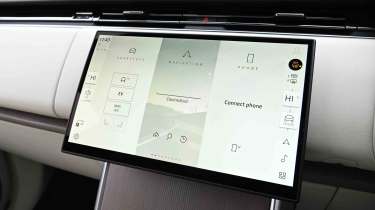
When this latest generation first arrived, we praised it for going against the grain and maintaining some easy-to-use physical dials, plus there was an innovative second screen that meant the main touchscreen was relatively clutter-free because climate and Terrain Response menus were taken care of by the separate screen. Now, as part of a simplification drive, the designers at Land Rover have ‘done a Tesla’ and stuffed all features into the 13.1-inch central touchscreen, getting rid of the extra screen, climate and heated seat dials, and the Terrain Response controller that used to live next to the gear selector. Even the parking brake switch has gone – it automatically comes on when you select ‘Park’.
All this is a major blow in terms of usability while driving, because using a touchscreen is far more distracting while on the move than a physical dial, and means the Range Rover has lost a valuable USP that set it apart from rivals like the Audi Q7 and BMW X7.
Materials and build quality
Fit and finish throughout the cabin is outstanding, and travelling in the Range Rover feels like a special occasion – more so than most traditional luxury cars. Nearly every surface is covered or made of either a soft-touch material, wood, or metal. We say nearly all surfaces, because the speaker grilles on the door near the windscreen pillar are made of cheap-looking hard plastic, which sticks out like a sore thumb and doesn’t seem fitting on an over £100k SUV.
For that reason, the Range Rover doesn’t have quite the high-end feel of a Bentley Bentayga, where there isn’t a cheap bit of hard plastic in sight – even the lower door cards and side pillar trim pieces are covered in high-quality leather, while the chrome air vents are exquisite.
Infotainment, sat-nav and stereo
As already mentioned, the previous car’s physical controls have all been moved to the landscape touchscreen, which remains at 13.1 inches in size, but has a tweaked layout with shortcuts running down either side. These bring up the temperature and seat heating controls, but while the large buttons are relatively straightforward to use, if you want to manually select where air is flowing, then the process is a bit more involved and requires going through various sub-menus.
The screen is split into three vertical sections, and while you can sweep between different menus, this isn’t the most intuitive set-up to use – the old version with the separate climate functions was perfectly usable, and it’s a shame the designers felt the need to change it. It’s a similar story with other functions, such as selecting access height – where before you just pressed a button, now you have to select it in a sub-menu.
A 400-watt, 14-speaker Meridian surround sound comes as standard and provides perfectly good sound, while the HSE gets an upgraded 800-watt, 18-speaker 3D Meridian surround sound system. Optional is a 1,600-watt, 34-speaker Meridian Signature surround sound system, which is worthwhile going for if you really enjoy your music and have a spare £4,500 to spend (it’s standard on Autobiography and above). Wireless Apple CarPlay and Android Auto mean your device is connected to the system as soon as you climb aboard.
Expert view, on design
"The interior still exudes the premium feel that makes the Range Rover a go-to luxury car for well-heeled buyers all around the globe." - Dean Gibson, Senior test editor, driving a P550e plug-in hybrid Range Rover.
Boot space & practicality
| Pros | Cons |
|
|
If you feel confident enough piloting a five-metre long premium SUV, then the Range Rover offers all the practicality and comfort you could need. The levels of luxury are really only restricted by how much you wish to pay, while useful touches that make everyday life a little easier haven’t been forgotten.
Standard kit includes a heated front windscreen, an electric tailgate, auto wipers and headlights, heated power-folding door mirrors, an electrically-adjustable steering wheel, adaptive cruise control and three-zone climate control. Cabin storage is good with twin gloveboxes, big door bins and a three-litre storage space under the centre armrest.
Dimensions and size
The standard wheelbase Range Rover model is a little longer than the previous model, measuring 5,052mm from front to back, with the long-wheelbase version adding a further 200mm. Overall width (including mirrors) is 2,209mm, while you’ll need to be well over six feet in height to peer over the big luxury SUV as it stands 1,870mm tall.
| Dimensions | |
| Length | 5,052mm (SWB), 5,252mm (LWB) |
| Width | 2,209mm (inc mirrors) |
| Height | 1,870mm |
| Number of seats | 4, 5, or 7 |
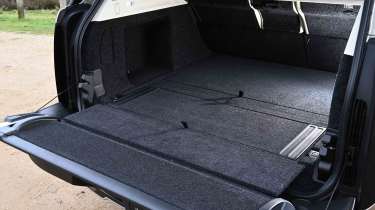
| Boot space | 725 - 2,601-litres |
Driving position, seats & space in the front
Neither the driver nor the front seat passenger will be left wanting for space in the Range Rover. There are lots of electric adjustments in the seats, although it is a little annoying that you will have to delve into the central touchscreen in order to adjust the lumbar, under-thigh support, and headrest height. At least the seat adjustment menu comes up on the screen if you move the physical seat controls that are on the door.
Getting in and out is made easier because you don’t have to clamber over a chunky door sill, plus the air-suspension lowers into its access height very quickly to help shorter people to get into this almost 1,900mm tall vehicle. It also means expensive side steps are redundant, which is a good thing in our view because they would spoil the lines of the Range Rover.
The vast width of the Range Rover allows for a pair of broad rugby players to easily have enough shoulder space, but that may mean those of a smaller stature might struggle to comfortably reach the central armrest. The designers have thought of that by putting smaller adjustable ones on the sides of the front seats instead.
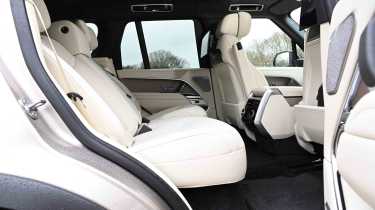
Seats & space in the back
Buyers can specify four or five-seat configurations in Standard or Long Wheelbase body styles, along with a seven-seat Long Wheelbase version, while Land Rover claims there is now an extra 44mm of knee room for passengers in the second row seats.
Passengers travelling in the third row of the LWB seven-seater model shouldn’t feel too short-changed as there’s 864mm of legroom on offer. The Range Rover’s ‘Stadium seating’ design means that those in the rearmost row sit 41mm higher than in the front seats, so visibility remains good and, when the third-row seats aren’t in use, the second row can slide backwards to unlock a further 50mm of legroom.
Boot space
Access to the Range Rover’s boot is slightly hampered by the split tailgate, because it makes it harder to reach into the load bay, although the lower section is now smaller than before to help mitigate this issue. Luggage capacity is good with the five-seat, Standard Wheelbase model offering 725 litres (loaded to the vehicle waistline), while there’s huge flexibility provided by the Long Wheelbase seven-seat version, which has a van-like 2,601 litres of carrying capacity with the second and third row seats folded away.
Towing
All Range Rover models are rated to tow up to 3,500kg, with the exception of the P460e and P550e plug-in hybrid models, which both have a towing limit of 2,500kg.
Expert view, on practicality
“You can't get a spare wheel with the seven-seat version, but you can option a space-saver spare with the plug-in hybrid.” - Max Adams, Online reviews editor, who drove the Range Rover in Europe
Reliability & safety
| Pros | Cons |
|
|
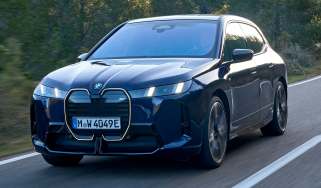
Just like its Sport sibling, the Range Rover received a top five-star rating from industry safety body Euro NCAP in 2022. It did well in terms of crashworthiness, beating the electric BMW iX in the adult occupant category and safety assistance technology.
The Range Rover comes with a comprehensive list of standard safety kit, including active systems such as Automatic Emergency Braking, Blind Spot Assist, Lane Keep Assist, a Rear Traffic Monitor and Traffic Sign Recognition, while the Park Assist function helps you manoeuvring in and out of parking spaces – particularly useful when you’re in charge of a luxury SUV behemoth.
Positive news for Land Rover is its continuing improvement in our annual Driver Power owner satisfaction survey. The manufacturer finished in 10th place (out of 32 brands), which is considerably up from its 22nd spot in 2021. Styling, engines and practicality were highly praised by owners, although the cost of ownership was rated poorly, as was the perennial Land Rover issue of reliability – concerns that the fifth-generation Range Rover needs to overcome.
| Key standard safety features | Euro NCAP safety ratings |
|
Buying and owning
- Best buy: Range Rover D350 HSE
Unless you live in a town and have easy access to electric charging to make the plug-in hybrid work for you, we’d recommend either one of the two diesel engines that are on offer. Of the two, the more powerful D350 only adds a small increase to the list price, and we think that’s worthwhile paying for the additional performance it offers. It has similar fuel efficiency to the D300, so you won’t be paying extra at the pumps to run one.
Mid-range HSE comes with all the goodies you could want with a Range Rover, plus a slightly fancier Meridian 3D surround sound system and nicer semi-aniline leather seat trim. It comes with 22-inch wheels as standard, but you can go for smaller 20 or 21-inch sizes for free to get the best ride quality. We’d suggest you go for the Convienience pack for around £900 to get the versatile load space floor to stop smaller items rolling to the back of the boot, while the £1,900 Interior upgrade pack adds the laminated side windows to lower the wind noise levels at motorway speeds and get you a Solar attenuating windscreen to help decrease the interior temperature when parked. Some might also find the £120 domestic three-pin plug option worthwhile for anyone in the back who needs to charge up a tablet or laptop on long trips.
Land Rover offers a three-year/unlimited mileage warranty for the Range Rover. The cover includes 36 months of roadside assistance, while you can also extend the warranty for up to ten years/100,000 miles at extra cost. The battery pack for the plug-in hybrid only comes with a six-year/60,000-mile warranty, which is a little mean considering a number of rivals offer longer eight-year/100,000-mile policies.
Flexible service plans are available, allowing you to pay for scheduled maintenance upfront or on a monthly basis. If you decide to sell your vehicle, the remaining balance of any service plan can be transferred to a new Land Rover model or refunded to you. Most of the engines have long 24-month or 24,000 miles service intervals, but the P530 and P615 V8 petrols need more frequent maintenance every 12 months or 12,000 miles.
Alternatives
Many premium manufacturers have started offering large luxury SUVs, with the Audi Q7, BMW X7, and Mercedes GLS being this Land Rover’s biggest competition. Above that, you could consider the Bentley Bentayga and Rolls-Royce Cullinan, although they’re both far pricier alternatives.
Some may consider the Range Rover to be in a class of its own because few cars manage to mix peerless on-road refinement, a highly luxurious interior, along with consummate off-road abilities. If you’re after better on-road manners at the expense of driving through a muddy field, then the Q7, X7, and Bentayga would be the ones to go for. The Cullinan has the refinement edge over the Range Rover, but it’s a hefty price you have to pay, both in terms of monetary value and taste, because the Rolls-Royce is anything but subtle.
The GLS is a more affordable way of getting a large SUV with seven seats, although you’ll notice the difference because it doesn’t have the sumptuous driving experience of the Range Rover, it isn’t as efficient in diesel form, and it doesn’t have the plushest interior in the class.
Range Rover pictures
Frequently Asked Questions
The Range Rover is a great luxury SUV because few can successfully blend being a luxury, an all-conquering off-roader, and a practical family car.
More reviews
In-depth reviews
Long-term tests