Land Rover Defender review
The Defender remains one of the most desirable SUVs around, offering a combination of genuine off-road ability, style and practicality
Is the Land Rover Defender a good car?
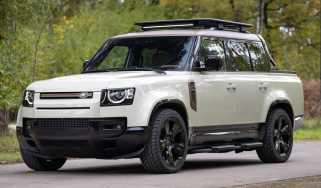
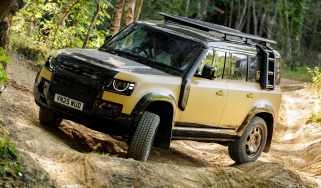
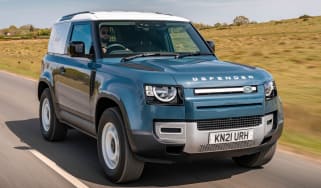
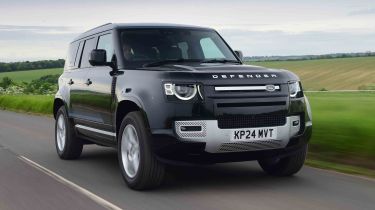
The Land Rover Defender more than backs up its handsome looks as a simply wonderful representation of modern British engineering. It had big shoes to fill in replacing a genuine automotive legend, but quickly silenced the doubters and proved itself worthy of the famous name.
Core to the Defender’s appeal is, of course, its off-road ability, which very few SUVs can match. Although a true 4x4, it also works well as a family car and looks the part in the most upmarket environments. The firebreathing V8 models have performance nailed, too – in a straight line, at least.
You’ll have to pay handsomely to get your hands on one, though, and there are all kinds of other rivals to consider – some of which are far more fuel efficient. However, few of those rivals possess the sheer character and desirability of the Land Rover Defender.
| Key specs | |
| Fuel type | Petrol, diesel, plug-in hybrid |
| Body style | SUV |
| Powertrain | 2.0-litre four-cylinder PHEV petrol, four-wheel drive 3.0-litre six-cylinder MHEV diesel, four-wheel drive 5.0-litre V8 petrol, four-wheel drive |
| Safety | 5-stars (Euro NCAP, 2020) |
| Warranty | 3yrs/unlimited mileage |
How much does the Land Rover Defender cost?
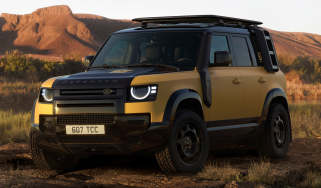
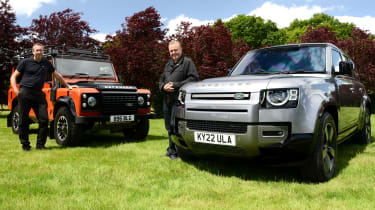
The old Land Rover Defender was characterised as a tough, no-nonsense off-road vehicle that would feel at home on a farm, the savanna or even a battlefield. The new one retains the original’s go-anywhere ability, but adds plenty of premium features to make it more of a usable SUV. It’s not exactly cheap, though, with the base 90 three-door starting at just over £57,000 and the larger four-door 110 getting under way at just under £63,000. The massive eight-seat 130 is priced from just over £84,000.
Used - available now

2020 Land Rover
Defender
49,597 milesAutomaticDiesel2.0L
Cash £44,990
2024 Land Rover
Defender
32,220 milesAutomaticPetrol3.0L
Cash £63,885
2023 Land Rover
Defender
27,789 milesAutomaticDiesel3.0L
Cash £52,581
2020 Land Rover
Defender
29,233 milesAutomaticDiesel2.0L
Cash £46,567There’s a fairly wide selection of powertrains to accompany the Defender and a slightly confusing trim level structure, complemented by Land Rover’s extensive personalisation programme and a long list of options.
The 90 starts in S trim and for that you get a 3D 360-degree camera, 19-inch alloy wheels, LED headlights and Land Rover’s ‘Resist and Resolve’ Seats, which use leather-free, easy-to-clean upholstery. At around £3,000 more, you can step up to the X-Dynamic SE which brings 20-inch wheels, a contrasting black roof and a Meridian sound system. The £68,000 X-Dynamic HSE adds 20-inch wheels, matrix LED headlights, leather seats and a sliding panoramic roof.
The Defender X in 90 trim sees a significant bump in price up to around £91,000. For that you get 22-inch wheels, electric air suspension and a digital rear view mirror.
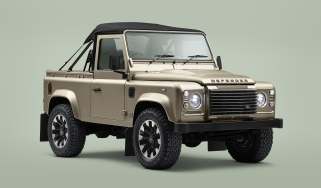
Land Rover sought to fix an issue that many Defender buyers faced in 2025 in regards to wheel choices. The retro-looking pressed steel wheels were previously only offered on less powerful models in 18-inches (Defender V8s and PHEVs came with larger brakes which meant the wheels wouldn't fit), Land Rover has created a new set of 20-inch steel rims - however the Defender X and V8s still can't be optioned with them.
The engine line-up for the 90 sees the base S offered with the D350 only, while the X-Dynamic SE and HSE come with the choice of D250 and D350 diesel mild-hybrids. The X comes with the D350, or for a premium of around £5,000, you can choose the P425 engine – a 419bhp supercharged 5.0-litre V8 that arrived in 2024 to replace the old P400 straight-six petrol in order to comply with emissions regulations.
Both the D250 and D350 diesels use a 3.0-litre, six-cylinder in-line unit with mild-hybrid tech. The D250 produces 247bhp, while the D350 (which replaces the 296bhp D300) produces a much more potent 345bhp.
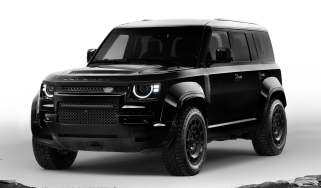
There’s also a supercharged V8 petrol option featuring JLR’s 5.0-litre engine with 518bhp in the simply named Defender V8. This model is available on the 90 from around £114,000, and comes with quad-exhaust tips, tinted windows, a bespoke terrain response system and V8 badging.
All Defenders use the same eight-speed auto transmission, plus four-wheel drive and a version of Land Rover’s Terrain Response system with a number of preset driving modes to help you negotiate different types of off-road driving terrain. There is a more advanced off-road package available with additional off-road driving goodies, such as an electronic locking differential to maximise traction in slippery conditions, plus variable height air suspension so you can clear obstacles more easily.
Aside from the V8 trim level, the Defender 110 gets the same options as the base 90, although there are a few special editions, including the Sedona Edition and V8-powered OCTA variants.
The 130 starts with the X-Dynamic SE and is topped off with the V8, although it gets a model-specific Outbound Edition, which removes the rearmost windows and the third row of seating, unlocking a massive cargo space. It costs just over £87,000 with the D350 powertrain, and offers some of the versatility of the commercial Hard Top editions of the Defender, while maintaining seating for four – handy if you need to take the family somewhere for the weekend, for example.
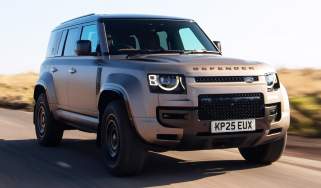
Engines, performance & drive
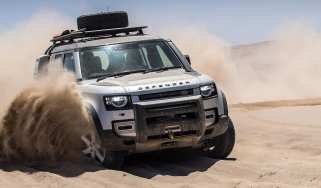
Land Rover’s engineers were tasked with ensuring the Defender could cope with everything expected off-road, before focusing on its on-road dynamics. Bearing that in mind, they’ve nailed the brief, because it feels like it’ll keep even the keenest 4x4 driver happy.
The Defender features either a coil or air suspension system depending on the spec, but all come with a low-ratio gearbox for greater control of the engine’s power over tricky obstacles, a locking centre differential to make sure that it is split evenly between the front and rear wheels to improve traction, and the manufacturer’s latest Terrain Response tech. The latter includes various driving modes that automatically adjust various driving parameters to make it a doddle to drive across whatever terrain you point it at.
All this off-road ability doesn’t come at the expense of on-road civility, however. The 22-inch wheels on X trim and V8 models firm up the ride a bit, but when fitted with smaller wheels, the Defender will appeal as much to the family SUV buyer as it does to the traditional agricultural sorts who loved the old one.
| Model | Power | 0-62mph | Top speed |
| Land Rover Defender 110 D250 | 247bhp | 7.9 seconds | 117mph |
| Land Rover Defender OCTA | 626bhp | 3.8 seconds | 155mph |
| Land Rover Defender 110 D350 | 296bhp | 6.1 seconds | 119mph |
What is the Land Rover Defender like to drive?
In town
Something you’ll notice immediately in the Defender is that it’s not the liveliest around town. There’s a big steering wheel that requires frequent input, and the transmission can be laboured. There’s a bit of lean during tight cornering and even the three-door 90 feels big in urban areas. Visibility up front is pretty good, despite a relatively long and high bonnet – it’s quite easy to place the slab-sided Defender on the road.
On A- and B-roads
The slow steering is a trait shared with the Ineos Grenadier, so the steering wheel isn’t wrenched from your hands while going over obstacles off-road. As you’d expect, the Defender isn’t a car you relish throwing around a B-road, although it’s a little more composed than its off-road focus might suggest. There’s a decent amount of grip and in the right gear, the straight-six diesel is a joy. V8 models obviously have straight-line performance (and an accompanying soundtrack) to excite, but they still feel utilitarian. For instance, pulling away from a junction, you’ll notice a lot of pitch – so much so that at night, the Defender’s headlight beam will blind oncomers.
On the motorway
The Defender has soft, long-travel suspension, which ensures all wheels maintain grip with the ground even when the suspension is articulated over an obstacle. This means that when pushed through corners at speed, the Defender will lean more than a BMW X5 would. The way it does this is predictable, though, and you quickly get used to it, adopting a more relaxed driving style. We’ve found that its softer suspension also pays off in terms of ride comfort, because the Defender (on smaller wheels) is remarkably supple even over rough sections of Tarmac.
0-62mph acceleration and top speed
A base-level Defender 90 D250 will sprint from 0-60mph in a reasonably brisk 7.6 seconds, before topping out at 117mph. It’s a 248bhp 3.0-litre straight-six, yes, but it’s not the smoothest of engines; the power can feel a little lumpy through the rev range, but overall it’s pretty unstressed in the Defender – especially in the smaller 90.
With 345bhp and 700Nm of torque (resulting in a rapid 5.6-second 0-60mph sprint) the D350 has plenty of punch and actually offers identical efficiency to the D250, with both featuring mild-hybrid technology.
If the torquey, but slightly unrefined, diesels aren’t to your liking, there’s a plug-in hybrid Defender P300e to consider. Available only on the 110, it has a four-cylinder, 2.0-litre turbocharged petrol engine with 296bhp and a 0-60mph time of 7.4 seconds. The transition from electric to petrol, or vice versa, is pretty seamless.
A P425 petrol option joined the range in 2024, replacing the old P400. It features a supercharged 5.0-litre V8 with 419bhp and 550Nm of torque, enough to propel it to 60mph in 5.5 seconds.
The first real ‘performance’ option is the supercharged Defender V8, which pumps out 518bhp and 625Nm of torque in the 90, while the bigger 130 has to make do with a slightly less potent version of the same engine with 493bhp and 610Nm of torque; this V8 is no longer offered on the 110. The 90 V8 promises a 0-62mph time of 4.9 seconds, while the 130 V8 takes a little longer, at 5.4 seconds.
Joining the line-up in 2024 was the Defender OCTA, which makes use of a 4.4-litre twin-turbocharged V8 from BMW’s M division. While it provides a different soundtrack to the wailing supercharged V8s, there should be no qualms with the power on offer. With 626bhp and up to 750Nm of torque, the OCTA is simply the most powerful Defender ever. The 110 OCTA manages the 0-60mph sprint in a supercar-troubling 3.8 seconds.
MPG, emissions & running costs
With such a bluff, upright profile and overall weight on the wrong side of two tonnes, the Defender isn’t going to be crossing continents on a single tank of fuel. Land Rover has added mild-hybrid tech to its 3.0-litre diesel engine to help improve efficiency, while there’s also the petrol plug-in hybrid to consider – although the high list price for that model may well deter some.
Choose any of the diesel-engined variants and the official average economy sits at around 33mpg. However, CO2 emissions are relatively high at over 220g/km.
The P425 petrol in the 90 bodystyle only manages 20.2mpg combined on the WLTP test cycle, and emissions of 316g/km. The plug-in hybrid P300e in the 110 bodystyle is able to return 103.8mpg, with CO2 emissions of 62g/km.
Unsurprisingly, the P500 and P525 V8 petrol engines are the least efficient options in the Defender range, capable of averaging around 20mpg at best in mixed driving conditions. What's more, CO2 emissions can average 329g/km. The more powerful Defender OCTA is actually more frugal than its supercharged siblings, with economy of 21.4mpg and CO2 emissions of 298g/km.
| Model | MPG | CO2 | Insurance group |
| Land Rover Defender P300e | 106.2mpg | 72g/km | 41E |
| Land Rover Defender 130 V8 P525 | 19.1mpg | 334g/km | 50E |
| Land Rover Defender 110 D350 | 33.2mpg | 240g/km | 41E |
Electric range, battery life and charge time
The Defender PHEV has the ability to rapid charge, so if you find the right charger (up to 40kW), you can refill a flat battery to 80 per cent in just 30 minutes. That’s quite an expensive way of fuelling the Defender, so most will do it via a 7kW wallbox charger at home using cheaper overnight electricity. Doing it this way will take about two and a half hours.
If you can justify the relatively short 30-mile electric range of the plug-in P300e hybrid, then you may see some decent overall fuel economy numbers if you regularly charge it up and stick to short trips. However, when we lived with an older-specification P400e over nearly 13,000 miles, we averaged only 30mpg, which is close to what you’d expect from a diesel Defender – and that’s much cheaper to buy in the first place.
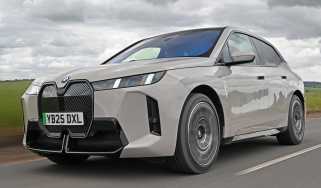
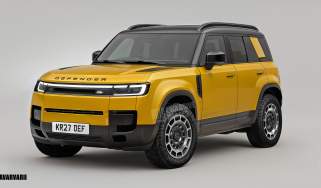
Company car drivers paying Benefit-in-Kind (BiK) tax may be tempted by its low average emissions of 61g/km. However, many alternatives, such as the BMW X5 xDrive50e, are in a much lower eight per cent band (at least until 2025). Then there is the all-electric seven-seat Kia EV9 to consider, offering much more space inside than a Defender, but costing even less per month. If you're looking for pure-electric power however, then it might be worth waiting for the upcoming Defender Sport - which we've already spotted testing ahead of a launch next year.
| Model | Battery size | Range | Insurance group |
| Land Rover Defender P300e | 19.2kWh | 27 miles | 41E |
Tax
Every Defender is subject to premium road tax (applied to vehicles costing over £40,000), so while hybrid drive knocks £10 off the annual charge, it’s still an expensive car for Vehicle Excise Duty (VED). The V8-powered models all require an eye-watering £760 of road tax a year.
Those concerned with company car tax will obviously veer towards the plug-in hybrid P300e model, which sits in the 19 per cent bracket due to its emissions of 72g/km, rather than its electric range.
Insurance groups
Premiums are going to be expensive for the Defender. Even the most basic Defender – a three-door 90 with the D250 engine – sits in insurance group 41 (out of 50), while the range-topping V8 falls into the highest insurance band.
There have been some historic issues with Land Rover owners getting insurance coverage for their cars, although the brand has been working hard on ways to improve theft resistance.
Depreciation
On the plus side, Defender owners will benefit from good residual values when the time comes to sell. Our latest expert data suggests that the Defender 90 retains between 53 to 67 per cent of its value over a typical three-year/36,000-mile ownership period. The 110 retains the most value (between 57 to 68 per cent), while the 130 is likely to lose the most, being worth between 47 to 55 per cent over the same ownership period.
That’s much better than the BMW X5, which will only retain between 40 to 53 per cent of its value over the same period.
To get an accurate valuation for a specific model, check out our free car valuation tool...
Interior, design & technology
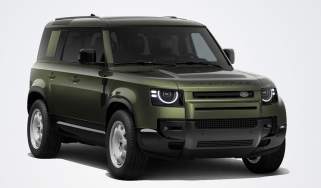
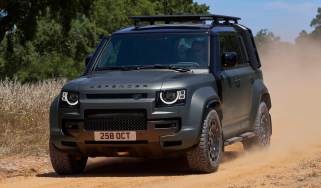
Land Rover has done a great job bringing the Defender into the 21st century. There’s a nod to the previous model regarding the overall look, but make no mistake, this 4x4 is definitely at the cutting edge in terms of off-road ability and on-board tech.
The proportions mimic the old Defender, but everything is bigger, chunkier and designed with function in mind. Inside, there are exposed screw heads, powder-coated aluminium surfaces, a magnesium bulkhead, strips of body-coloured metal, and even a moulded rubber floor covering that’s designed to be washable. While it’s not the usual Land Rover level of luxury, it brings a unique utilitarian look to the cabin that’s very cool, yet it feels just as well screwed together as anything else on sale, and has enough soft-touch materials in all the right places to maintain a premium ambience.
Standard equipment for the S trim includes 19-inch alloy wheels, LED headlights, heated seats, wireless smartphone charging and power-folding door mirrors. Stepping up to X-Dynamic SE adds 20-inch wheels, privacy glass and a black contrasting roof, along with silver exterior trim, while X-Dynamic HSE trim adds a heated steering wheel, fancier matrix LED headlights, Windsor leather seats and a panoramic glass sunroof. High-end X models feature additional trim upgrades in the cabin, along with a black-coloured roof and bonnet, a 700w version of the Meridian sound system with an additional four speakers and a head-up display.
What is the Land Rover Defender like inside?
The design of the Defender’s interior does a great job of complementing the exterior. Land Rover could have made too many cheesy nods to the old car, or festooned it with a bewildering amount of futuristic technology. But we think it has managed to get the balance just about right.
What is the interior quality like?
The interior quality in the Defender is excellent, which will be good news to those using it for family transport, or bunging tools or pets in the back. The Resist and Resolve seat upholstery makes it easy to keep the Defender clean inside, and you can relax in the knowledge it’ll take some serious tampering for any trim pieces to become loose.
Sat-nav, stereo and infotainment
JLR's Pivi Pro infotainment system is the slickest we’ve yet seen from the firm, and comes with Android Auto and Apple CarPlay smartphone connectivity as standard. The system allows for over-the-air software updates, which is something we found particularly useful when we ran a Defender 110 P400e, saving us from having to take a trip to the dealer. Entry-level models used to be fitted with a 10-inch touchscreen, while higher-end X-Dynamic HSE and above versions got an 11.4-inch display, however in 2025 Land Rover started fitting a 13.1-inch unit as standard. Taken from the Range Rover Sport and we've found it to be a huge improvement over the previous versions, thanks to Land Rover’s uprated infotainment system, boasting sharper graphics and quicker responses to inputs.
We’ve found the system to have a reliable phone connection and swift response times. We’d still prefer to have physical buttons, or a dial, like the iDrive set-up used by BMW, and the screen is not angled towards the driver at all, but at least it is easier to operate than most rivals’ infotainment systems.
In addition to the Pivi Pro infotainment, entry-level Defenders feature Land Rover’s Connected Navigation Pro, a 400W Meridian audio system with 10 speakers and an online data plan. Wireless phone charging remains an option on most models as part of the Comfort and Convenience pack, and only becomes standard on the priciest V8 models.
Boot space, comfort & practicality
The Land Rover Defender is brilliantly practical, with basics such as the useful central storage bin and deep door pockets, while even a fridge can be fitted under the centre armrest of some models. There’s also the usual generous supply of cup-holders, power outlets and air vents around the cabin. All versions besides the S get full electric front seat controls with memory settings, so you can easily find the most comfortable position.
The boxy proportions of the Defender mean it's easy to see the corners of the car and judge where to place it on the road, but all models come with an advanced 360-degree 3D surround camera – something you have to pay extra for on a BMW X5 – for a little extra help when parking. There are also clever touches to help you with towing, with the on-board cameras assisting you in lining up a trailer, while the air suspension can raise and lower to make hitching up easier.
The ClearSight system is another handy addition for Defender drivers and comes with Mirror or Ground functions. The rear-view mirror can be used normally, but is also able to display a rear-facing camera feed when either rear passengers or a tall item in the boot is blocking your view through the rear window. The central touchscreen can be used to relay footage from the numerous cameras on the outside of the car, so you can see what's beneath and just in front of the vehicle – invaluable when off-roading.
In 2024, the Defender 130 gained the option of the Captain’s Chairs Pack, which adds two individual seats in the second row for “ultimate comfort, spaciousness and versatility”, according to Land Rover. You can still access the third row, with an aisle between them. The middle-row Captain’s Chairs feature heating and cooling functions with new headrests, armrests and cup-holders.
| Dimensions | |
| Length | 4,583mm (90), 5,018mm (110), 5,358mm (130) |
| Width | 2,008mm (2,105mm inc. mirrors) |
| Height | 1,974mm (90), 1,967mm (110), 1,970mm (130) |
| Number of seats | Five |
| Boot space | 297-1,263 litres (90), 786-1,875 litres (110 wi. 5 seats), 1,094-2,078 litres (130) |
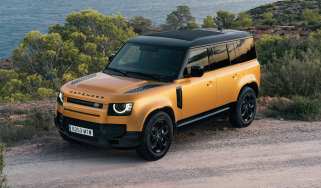
Dimensions and size
Given the focus on off-road ability and ground clearance of up to 294mm, it’s no surprise that the Defender feels like a big car – inside and out. On coil suspension, the Defender 90 measures 1,974mm tall, compared with 1,969mm when fitted with air suspension. The overall length of the three-door (spare wheel included) is 4,853mm – longer than a Nissan Qashqai. It’s also a fairly chunky 2,008mm wide.
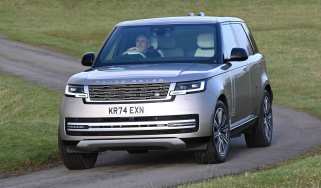
The five-door variant is unsurprisingly longer at 5,018mm, although overall width is the same as its smaller sibling. The even longer, eight-seat Defender 130 measures 5,358mm in length – more than 10cm longer than the flagship Range Rover luxury SUV and far longer than a Mercedes G-Class.
How practical is the Land Rover Defender?
Seats & space in the front
There’s plenty of room up front in the cabin of every Defender, although rear cabin space varies depending on the model you get. While overhead windows mean a lot of natural light, there’s very little space in the rear of the Defender 90, and because it's only a three-door, access to the back seats isn’t the easiest. The front seats fold and slide forward, but it feels like a mountain climbing expedition every time you have to haul yourself aboard.
Seats & space in the back
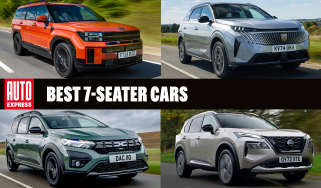
As you'd expect, there's much more room in the back seats of the Defender 110, which are also easier to access thanks to the additional doors. If you want, you can specify an extra seat between the driver and front passenger in the 110 model to make it a six-seater, or add a further two seats in the boot to make it a seven-seater – strangely, you can’t combine the two options to make yourself an eight-seater. If you do get the seven-seater 110, the second row comes with a sliding function, so you can give taller passengers in the third row a bit more legroom.
The Defender 130 puts most MPVs to shame, with its extra length allowing for two rows of three seats behind the driver and front passenger seat, for a total of eight occupants. These are arranged with a slight ‘stadium-style’ increase in height for a good view out, and there’s even a second sunroof above the third row.
Every version comes with ISOFIX child seat tethering points on the outermost positions of the second row.
Boot space
The three-door Defender 90 has a 297-litre boot, which is actually smaller than a Vauxhall Corsa and much smaller than the 390 litres of space provided behind in the back of a three-door Toyota Land Cruiser. If you need to carry longer items, dropping the rear seats in the Defener 90 gives you 1,263 litres to play with.
The Defender 110 offers a more generous amount of boot space, which should be enough for most families. If you get the five-seater 110, there's 786 litres of space on offer behind the rear seats, and 1,875 litres with them down. Plug-in hybrid versions of the 110 offer slightly less luggage capacity because of the battery located under the boot floor, reducing the available boot space to 696 litres with all five seats in place and 1,759 litres with the rear seats folded away.
Opt for the seven-seater version of the 110 and there's 160 litres with all three rows of seats in place, 743 litres with two rows in the upright position and the same 1,875 litres with all but the front seats stowed in the floor.
The eight-seater Defender 130’s boot isn't that much bigger. There's 290 litres of space available even with all eight seats in place, and if you fold the second and third rows down there’s close to 1,900 litres on offer. For those who prioritise luggage capacity, a five-seat 130 is also available, boosting ultimate boot space even further to nearly 2,100 litres.
The Defender uses a side-opening tailgate, which has its positives and negatives. You’ll have to be a bit more wary in tight car parks with the big spare wheel bolted to the outside. However, if you’re tall and clumsy, you’ll never have to worry about banging your head when loading up.
Towing
Most versions of the Defender have a maximum towing limit of 3,500kg, although the plug-in hybrids and heavy Defender 130 have a reduced braked trailer towing rating of 3,000kg. In either case, that’s a lot more than the 2,700kg capacity of the best-performing plug-in hybrid BMW X5 xDrive50e.
The Towing Pack includes an electrically deployable tow bar, and the 13-pin electric point is located within easy reach. You can also add an Advanced Tow Assist function where you can use the rotary dial from the Terrain Response system to steer the vehicle in reverse. Pull the dial up while reversing, and you can steer the car and caravan/trailer using the moving directional arrows on the screen, which show where the car will go. We think that’ll be helpful for those who struggle with this task.
Reliability & safety
From just looking at the Land Rover Defender, you’d think its chunky and robust design would mean it is virtually unbreakable. Although it didn’t appear in the latest 2024 Driver Power survey, our own experience confirms it feels as well-screwed together and reliable as you’d hope for. Owners’ feedback about the brand is showing signs of improvement, too, with Land Rover moving up from 22nd position (out of 29 brands) in 2021 to 14th spot in 2022 and 2023, then rising again into tenth spot in 2024.
The Defender comes with a host of safety kit and active systems designed to help avoid a collision, and Euro NCAP was sufficiently impressed to award the model a full five-star rating.
Standard equipment includes adaptive cruise control to keep you a safe distance from the vehicle ahead, and a Lane Keep Assist system to keep you within your lane on the motorway. In town, there’s Auto Emergency Braking to mitigate or avoid low-speed collisions with other vehicles and road users, along with a Traffic Sign Recognition to warn you of speed limit changes. Being such a large car, blind-spot warning is standard to let you know of other vehicles alongside you if you go to change lanes; plus, there’s a rear-cross traffic monitoring system to warn you of vehicles crossing from behind when you have to reverse out onto a main road. Land Rover has also added the Secure Tracker Pro to all Defenders, which integrates authentication technology into the key fob. An alert will be sent within minutes if your car is stolen with non-authorised keys.
| Key standard safety features | Euro NCAP safety ratings |
|
|
Warranty
Land Rover offers a three-year/unlimited mileage warranty, with the option to extend cover, at extra cost, for up to ten years and 100,000 miles. There’s also three years’ free roadside recovery.
Both of these are very similar to what you’ll find from BMW, but are quite a bit shorter than the up to 10 years or 100,000 miles of cover you can get with a Toyota or Lexus.
Servicing
Land Rover offers individual fixed-price Service Plans. You can either pay monthly or as a one-off payment, and if you decide to sell your vehicle, any remaining Service Plan balance can be transferred to a new model or refunded.
Land Rover Defender P400e long-term test
Back in 2023, then Editor-in-Chief Steve Fowler ran a plug-in hybrid Land Rover Defender 110 P400e for a long-term test. He loved a number of thoughtful interior design touches that just made life that little bit easier, including the ability to have updates carried out over the air, meaning he didn’t have to endure time-consuming trips to the Land Rover dealer.
He even lent the Defender to his friend Adrian Chiles, who took it on an extended European holiday. However, such a trip with no charging, plus Steve’s regular trips to Liverpool and back to watch the football, meant fuel consumption overall was around 30mpg, so he reckoned he’d have been better off choosing the cheaper to buy diesel instead.
Land Rover Defender alternatives
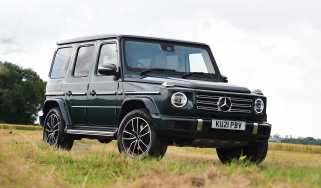
Positioned as a premium SUV, although not quite at the same level as a Range Rover, the Defender has a whole bunch of tough competitors – but it’s also a focused off-roader, so it has to fight on two fronts. The likes of the Audi Q7, BMW X5, and Mercedes GLE are alternatives when considering the quality on offer. If you want something with similar off-road prowess, the Toyota Land Cruiser is a close rival, while top-spec V8 versions of the Defender aren’t too far away price-wise from a Mercedes G-Class these days.
Frequently Asked Questions
Setting fuel economy aside, there are few other cars that are as easy to get on with, as capable, and as versatile as the current Land Rover Defender. If you can afford one, you won’t be disappointed
More reviews
In-depth reviews
Road tests